Monday, November 28, 2016

Google Put The "NEW" in Google Sites!

@LisaBerghoff/@Joe_EdTech

I recently had a chat with a good friend who is in sales. We were talking about the holiday shopping season and buying trends. My friend made a comment that I found particularly interesting. She said "It's very easy to sell people what they already have and love".  This certainly seemed true when I went home and looked into my closet. I am only a little bit embarrassed to share with you that I own more than 3 pairs of black pants and several gray tops.  I try to mix it up, but find myself gravitating back to what feels comfortable and what works for me. 

Her comment made me think about our relationship with Google products. We love that we can collaborate, easily share, auto-save, and track our changes on Google docs, slides, sheets, forms, and drawings. The one product that has been a bit of an anomaly is Google Sites, Google's website creation tool. For the past few years, teachers and students have commented that Google Sites is not at all intuitive.  It doesn't have those wonderful features that make us go back to Google products over and over again. 

Over the summer, Google announced that a new version of sites was being tested with a small group of customers. Our district staff was chosen to be part of the Early Adopter Program so we could get our hands on the new version of Google Sites as soon as possible. About two weeks ago, our students were granted access to the new Google Sites via Google's rapid release program. 

Teachers who have used the new Google Sites are pleased that those familiar and favorite features of other Google products are now part of the website creator. We can now hang Google Sites in our closets right next to docs and all of those black pants!
Yes, it means that I need to re-do all of my Google Sites training videos, but I am excited about the new features that we now have. 

Here Are The Main Features In The New Google Sites:

1. Drag and Drop Editing: 

The "classic sites" version has several drop down menus and settings to change. The new Google Sites allows you to add items to your webpages by dragging and dropping to add content and rearrange items, including images and other media. 

2. Real Time Collaboration and Save:

Yes, you can add editors to your classic sites. However, only one person can be editing on a page at a time. Everyone else is locked out while the page is being edited. The new Sites allows for real-time collaboration much like multiple editors on a Google doc. Multiple editors can work on a web page at the same time and see the changes happen live. Also, your edits will automatically save. When you are ready to go live, you can publish to your organization or to the web. Once you publish, you can continue to edit your site. 

3. Design For Multiple Devices:

Classic sites users know that webpages often only display well on standard computer monitors. This is not realistic as we know that our students, parents, and other teachers are often using devices like smartphones and tablets. The ability for the display to adjust and scale to other screens is called responsive design. The new Google Sites themes use responsive design so they look great no matter what size screen you are using. 

4. Very Easy Access To All Of Your Drive Content And Ability To Embed External Content:

Since Google basically started from scratch with the new Google Sites, it makes sense that there is more streamlined connectivity with all of your content stored in Drive. You can also grab an embed code to embed external content, such as an article or favorite blog post. That's a hint!

Do not panic if you are using classic sites and are not ready to make a switch!

Google has announced that "Classis Sites will continue to exist in parallel to new Sites as we add capabilities to new Sites that are similar to those found in classic Sites". Beginning in 2018, Google will send timelines and instructions for gradually migrating from classic to new sites. 

In other words, the new Sites is very pared down right now and as they are adding more features they will keep classic sites open. They will offer advice and instructions on how to make the switch eventually from classic to new. 

If you are curious and want to see what it looks like, just click the Sites icon in your apps doc, which is the collection of nine dots in the upper right corner of your screen. When you click the red "create" button, you can choose new sites and check it out. If you are just starting projects where your students are creating sites, I would go ahead and have them create using the new version of Sites.  

As always, I'm here to help you figure it all out, or just offer some moral support as you try these new tools with your students. 

Here is a 3 minute video created by GSuite. It shows you how to get started using the new Google Sites. 

And for those of you who are reading to the end, I want you to know that I am thankful for you!
Here is a little gift. It's a video from my favorite president: Kid President. He offers up 25 reasons to be thankful. I hope it makes you smile. He tends to have that effect on people.


Are you using the new Google Sites? Feel free to share your comments below.

Do you have things to add to the list of reasons to be thankful? Please share!


Tuesday, November 22, 2016

From the Triventy Website
Sharing the Load: Collaborative Online Quiz Creation with Triventy

@joe_edtech/
@LisaBerghoff

It is the day before Thanksgiving Break and I think one of my friend's Facebook Posts from last night summed up everyone's feelings perfectly, "I have decided that I no longer want to be an adult. If anyone is looking for me, I will be in my blanket fort, coloring."

It has been an eventful and crazy Fall. After suffering through 108 years of abject failure, the Cubs won the World Series and an entire region of the country came together to celebrate a victory which transcended baseball. As a country, we are dealing with an election cycle that more closely resembled a badly staged reality TV show than anything I've ever seen before. Even still, with seismic social events going on, our lives, and our students' lives, go on. Kids are dealing with classes, activities, medical issues, family issues, stress about the future, and the pitfalls of navigating everyday spaces in high school. This Fall, more than almost any other, I'm conscious of the fact that our kids need us to talk to them - they need to know that there are adults who care about them and will be there for them. It is a reminder that the most important thing that we do is teach kids, not content.

But having said that, class goes on. And we are faced with meeting the challenges of providing our students with the skills and knowledge necessary to be successful at the next level. Especially when demands are high, and timelines are tight, I think we have to find ways to share the load and work together. If we've lost some class time this Fall because of, well, the world interfering with our plans, we at least have great colleagues on whom we can rely and with whom we can collaborate. 

Generally speaking, the Free Tech Tools that we choose to share are selected to provide you with a different way of engaging students. Today's tool was selected as a different way of engaging your colleagues and capitalizing on our shared ideas and efforts.

Most of us are familiar with online quiz/gaming tools like Socrative, Kahoot, and Quizlet (see our previous blogs for detailed information about all three). Triventy.com is not a paradigm shifting online quiz platform. It is an online quiz platform that makes it easy for several teachers to work together to create a quiz. Need to pare down a lesson to its most important skills to save time? Or do you want to spend a little time during your late start working together focusing on the essential questions from a unit of study? Triventy.com is a tool that can facilitate some of that work.

Start by going to Triventy.com and sign up for a free account. Since Triventy integrates nicely with Google Classroom, make sure that you use your district email account when you sign up. Also, in order to use the full product for free, you'll need to select the Free Edu version and identify District 113 when you sign up.

Once you've signed up and you begin writing your first quiz, the platform will look a lot like other quiz creation tools. You can add images to identify topics. You compose questions and answer choices. Decide if you want the questions to be worth points and have a right answer, or serve as a poll/discussion starter. There is even a place to provide hints and feedback.


What makes Triventy different, though, is the ability to invite others to add questions to the quiz.


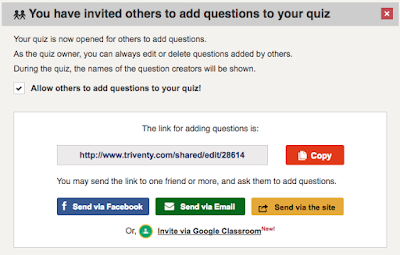
Once you click the button to invite question contributors, you get a link that you can share with your colleagues in a variety of different ways (email seems to be the most efficient). Your colleagues click the link and add questions. As the owner of the quiz, you can always decide to edit or remove any questions that have been added to your quiz. Also, if you have a group of people adding questions, their will be an author's name attached to each question. No question is submitted anonymously.


Finally, since you can integrate the tool into Google Classroom, you can actually invite your students to create quiz questions. Never underestimate the power of asking your students to find the right questions to ask! The same rules apply to students. They cannot submit questions anonymously, and all questions they submit will have to be approved by the quiz owner.

Here is a short video introduction to Triventy.com from Richard Byrne, author of the Blog Free Technology for Teachers. (I highly recommend his blog - if you are ever stuck for an idea, that is a great place to start.)


-------------------------------------------------------------------------------------------------------------
Got any other tools that help you share the workload with your colleagues? Tell us about them below!


Monday, November 14, 2016

Reduce The "Noise" When Reading Online, Save Paper And Ink With PrintFriendly PDF


Today's free tech tool is truly a "two-fer". Now that our students have printing capabilities from their chromebooks, it's time to teach them a lesson in responsible printing. Let's face it, we could all use a refresher when it comes to this topic. I have definitely been guilty of hitting the print button only to be shocked at the number of pages that come out of the printer. If I thought I was printing a long document, that would be one thing. However, I am usually caught off guard by how many pages (and ink) are taken up by the ads, navigation bars, and other "junk" that sits on the average web page. It's an honest mistake and one that can easily be resolved with an extension called PrintFriendly PDF.   For those of you counting at home, that's one ability from today's tool.

 Where is the aforementioned two-fer?

Interestingly enough, most of the teachers that I talk to who use PrintFriendly PDF don't actually ever print. They use it as a distraction-free, easier on the eyes, reading view. We often want our students to access text from digital content that is laden with distractions and might even be difficult to read because the page is cluttered with extras that make it difficult to read. 

PrintFriendly PDF is both an extension*  and a website that you can use. It gives you a print preview, it allows you to edit before printing, and you can save it as a PDF if you are not ready to print. On the website, you simply cut and paste the website URL into the box at printfriendly.com. The extension has the same capabilities. Once you add the chrome extension from the chrome webstore, you just click on the little icon on the top right side of your screen and you will magically see your clutter-free version of the text. If you choose to save it as a PDF, you can easily share it, remove images, change the font size, or even email it. 


Here is a screenshot of one of my favorite websites:


Here is the same website with PrintFriendly PDF:

Here is a video showing how PrintFriendly PDF works. It's just under 2 minutes. Enjoy!


Are you using PrintFriendly PDF or other tools to clear the clutter when reading and make printing safer for the environment? Comment below to share!

*Quick check for understanding: an app is like a car, you drive it to get somewhere while an extension is like the air conditioning in your car, it runs while you are driving to make the driving experience better

Monday, November 7, 2016

Google Drive: 

A Safe Place For All Of Your Files 

Top 5 Reasons To Use Google Drive Desktop App!

@LisaBerghoff/@Joe_EdTech


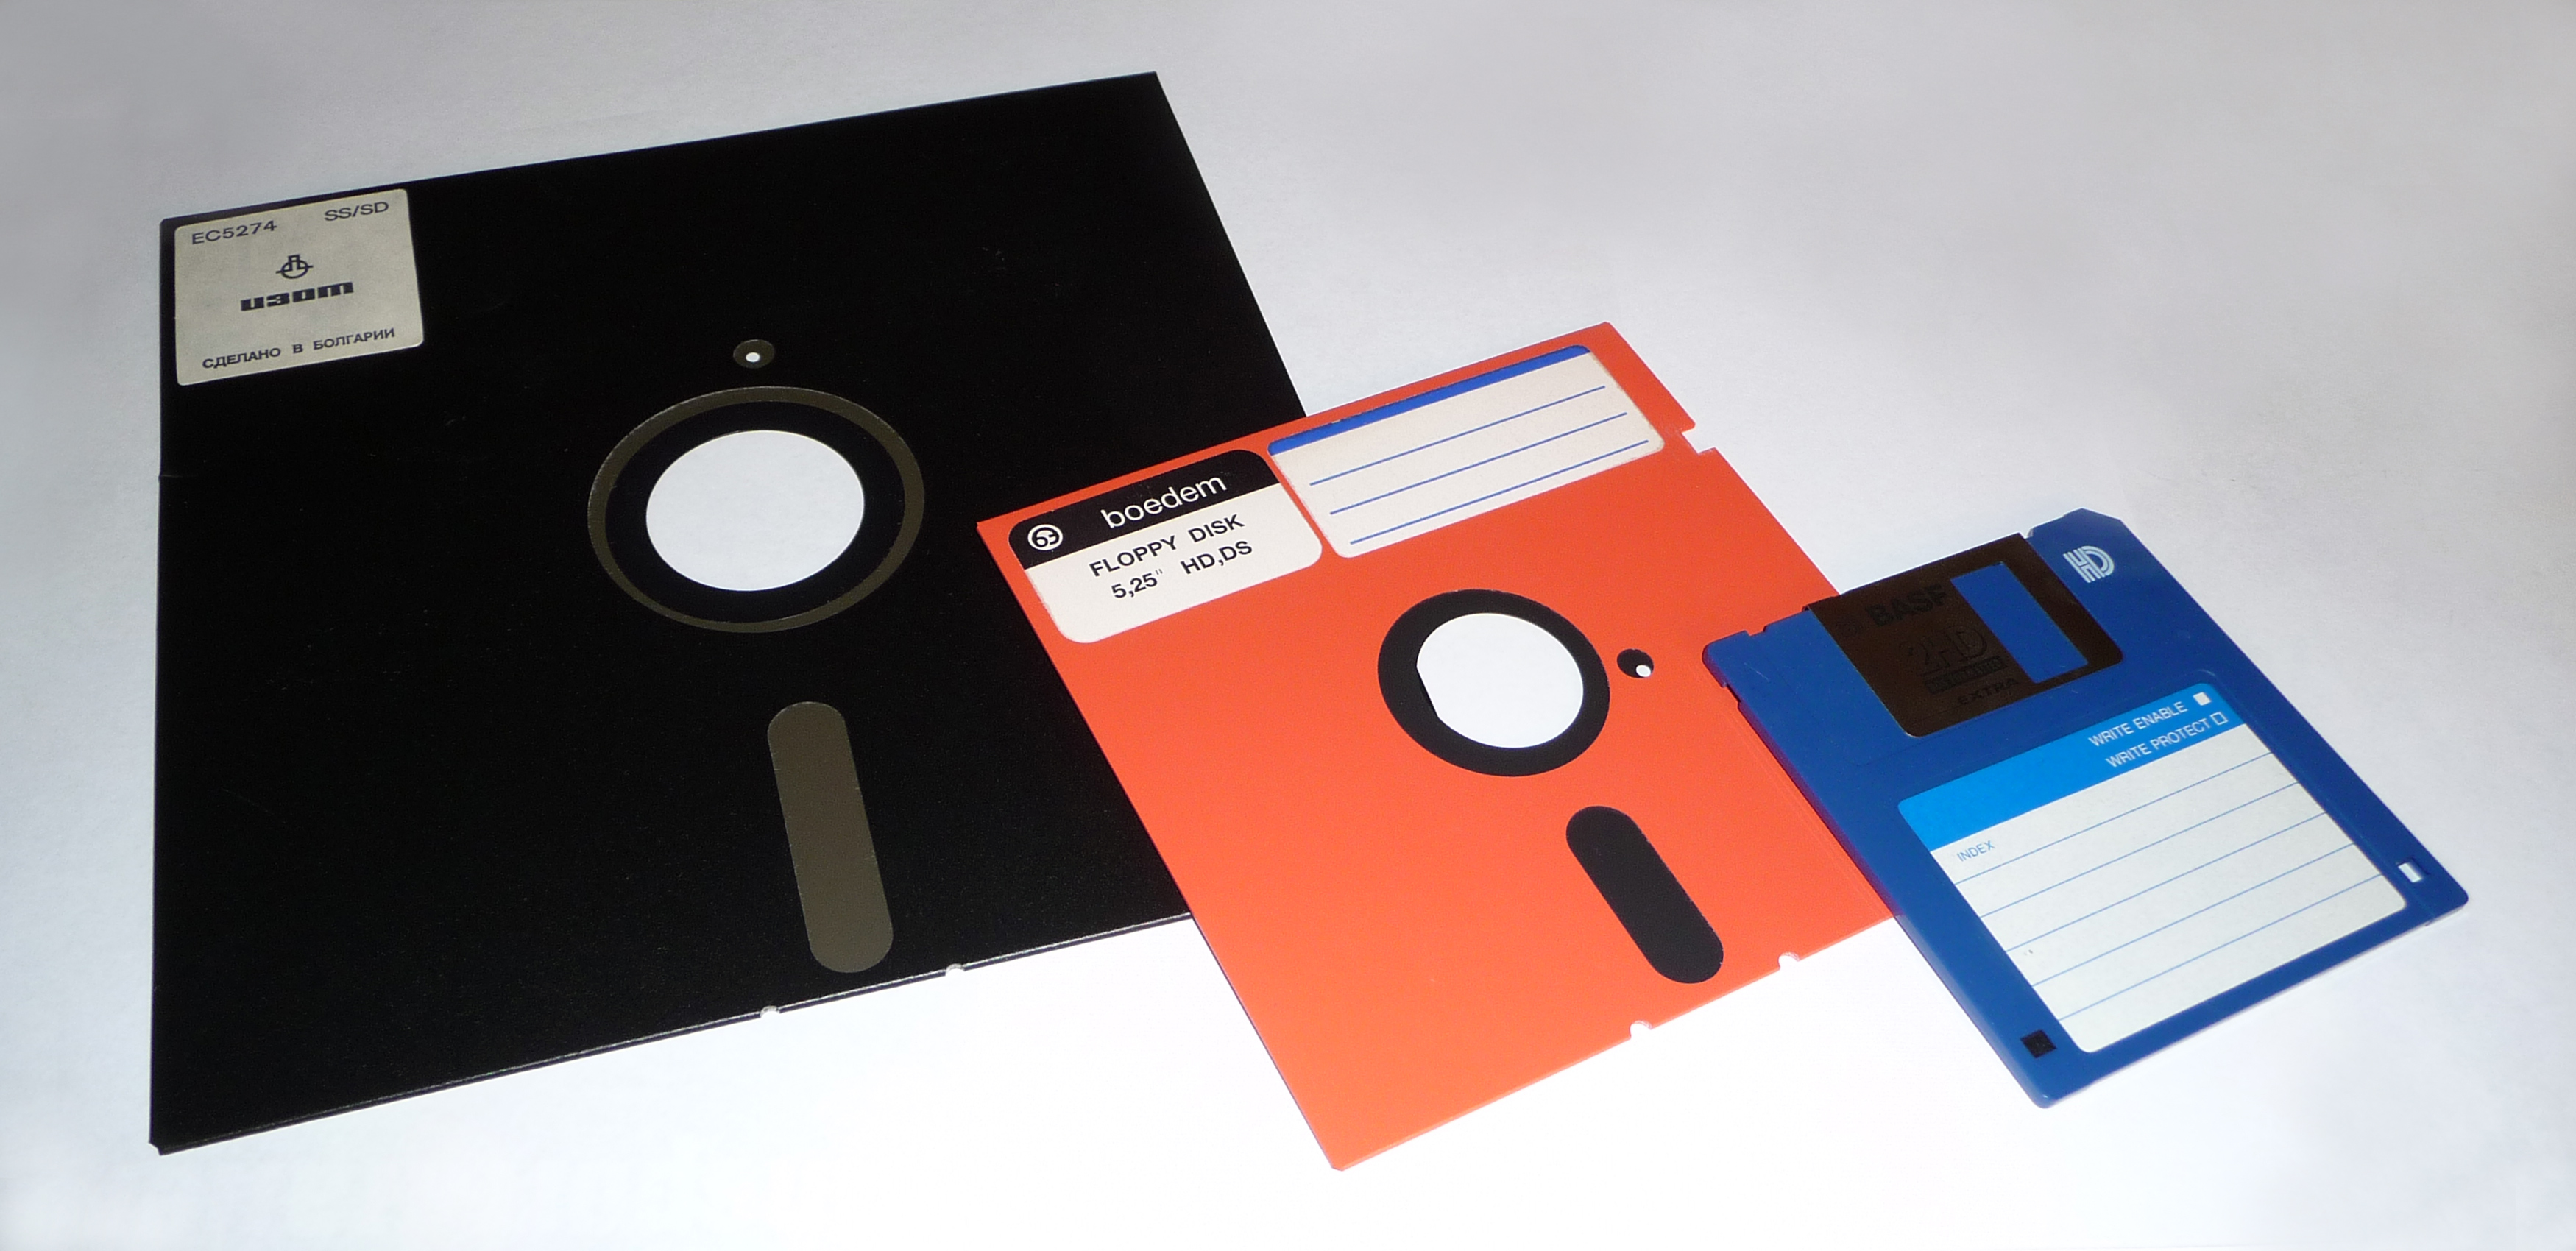
I recently cleaned out some boxes in my basement. I've lived in my house for 10 years and I had boxes that had been moved but never opened. I found several hard, opaque, plastic cases. My son opened them and had absolutely no idea what was inside. The cases were filled with floppy disks. Remember those? They made it possible to save, store, and transport digital files. It wasn't that long ago that we were carrying around and sharing floppy disks.
There are many things that I get nostalgic about when I think about the 80's and 90's. Floppy disks, however, are not in that category. Today we have many options for cloud storage. The latest and greatest of those is Google Drive. Before I explain the Google Drive desktop app, here is a 2 minute video that explains the cloud. So many of you have asked and it's a great question! Enjoy:


Now, here is what you should know about the Google Drive Desktop App.

Did you know that you can use Google drive to store and sync your files (not just Google files) across devices AND access then offline, without a browser like Chrome or Explorer? You might be saying to yourself, wait a minute, I already use the Google Drive web app. Why would I also need the desktop app?

I'm so glad you asked! Even though they are both called Google Drive, and use the same symbol, they are actually different apps and serve slightly separate functions. The functionality of the desktop app is primarily for file sync, storage, and backup. Files placed in your desktop Google Drive folder will be synced to the web. It works the other way too. If you have files uploaded online and shared with you by others they will also be synced to the Google Drive folder on your computer for local (offline) access. The web app gives you all of the other functionality including the ability to access deleted files, revisions, share files, edit Google docs, search your files, and the list goes on. When used together, these two apps provide functionality with very few limitations.

Here, as promised, are the top 5 reasons to use the Google Drive desktop app:


1. Sometimes I just want my documents to stay in Word, or Adobe, or Photoshop when I edit them because the formatting needs to stay the same.

Have you converted a PDF to a Google doc only to find out your perfect table or chart is in complete disarray? Use the Google Drive desktop app to store your files but then use the original program to open and edit them. Problem solved:)

2. The internet is not always so reliable.

We've all been in class, or in meetings, or at home, when the internet seems to be having a bad day. Or, perhaps you are editing a large video or audio file and the internet can't seem to keep up. Use the Google Drive desktop app to store and sync these files but edit offline.

3. I'm getting the feeling that I'm using up too much space on my network share. 

If you have that feeling, it's probably because it's true. Go with your gut on this one.  The Google Drive desktop app has unlimited storage, and it won't get in anyone's way like file cabinets and shelves. 

4. I have things saved in a million places, and if my computer crashes I'm in big trouble!

Don't worry! With the Google Drive desktop app you can easily put everything in one place and can organize with folders. Your files and folders will sync so it won't matter what machine you are on. 

5. Downloading and transferring files couldn't be easier.

Once you have the Google Drive desktop app set up, you can just drag and drop your files or whole folders to transfer them. Or, if you want to use this as an opportunity to weed out some of the files that you are no longer using, you can choose and transfer. 


Ready? Here's how to do it...

Your Google Drive Desktop app is probably already on your computer. You can search for it by typing in the search bar on your desktop. If you don't see it, you can contact the tech office and they will make sure it is there for you. Once you click on it, you will need to enter your school email and password for sync purposes. Once it is set up, you will notice a new icon on your desktop that looks like this: 


When you want to save and store a file, you can launch the app and drag the file into Google Drive. Or, you can choose Google Drive as the save destination. It will now show up as one of your options as you can see here:


Interested? Still have questions? No problem, I am here to help. Don't hesitate to contact me and we will sit down and set it up together.
Already using the GDrive desktop app along with the web app? Use the comments section below to share your thoughts. 


Tuesday, November 1, 2016

Flipped or Blended - Make Taking Notes on Videos Easy and Visible with VideoNot.es

@joe_edtech/@LisaBerghoff

One of the common complaints I hear about Chromebooks is how difficult it is to multitask on them. Sure you can open an endless number of tabs across the top, but moving between tabs to accomplish goals can be difficult. So, what do you do if you have a presentation or a video you want to give to your students, but you also want them to actively take notes or synthesize material?

If you are using an online video, VideoNot.es could be a great solution for your students. An add-on to Google Chrome, VideoNot.es allows you to split your screen and watch an instructional video on the left and take time-stamped notes on the right.


And because it is all integrated with Google Drive, it is simple to share notes in collaborative groups or just between student and teacher.

VideoNot.es can be found on the Chrome Web Store by clicking here. VideoNot.es is an extremely simple tool to use, but here is a quick video demo from Teacher's Tech:


-----------------------------------------------------------------------------------------------------------

What notetaking or multitasking shortcuts have you found for the Chromebook?