Tuesday, December 12, 2017

The Making Of The Perfect Password

@LisaBerghoff/@Joe_EdTech


With the expansion of technology in every aspect of our lives, from shopping to banking, to photo sharing, it becomes more and more important to stay on top of your security game. One of the most basic things we can do to protect our digital data is to create strong passwords. 
We all know this but how many of us actually do it? 

There are a number of valid excuses including:
  • I can't remember a different password for everything I d
  • o online.
  • It's too hard to keep track of the requirements for different sites.
  • It is so time consuming to change my password all the time.
  • I don't think anyone would actually want to hack my information.
  • My passwords are strong enough.
Let's first take a look at what constitutes a strong password. 
Strong passwords are made up of Upper and Lowercase Letters, Numbers, Special Characters, Nonsense Words, and are Lengthy. 

How are we supposed to keep track of all of that?  You can create your own algorithm, or set of rules, to create strong passwords that you will always remember and NOT need to write down. (please don't write down your passwords).

Here's how it works.
1. Start with a base word. Choose any word that you like. For example, I'm going to use the word MOIST because so many people hate that word!

2. Turn your base word into a nonsense word. I will turn moist into molisat because it has my name in the middle.

3. The site that I am logging into requires at least  8 characters in the  password so I'm going to put the number 7 in front of it. I will always use one digit below the requirement. My password at this point is 7molisat.

4. Now I need to add special characters. The site that I'm logging into is a .com site. I will use $ for all .com sites. Also, it's a work related site. I'm going to add @ for everything dealing with work. I'm also going to add _ in between the characters. 

5. My final password is now 7molisat$_@

How do I know if this is a strong password? I can put it in How Secure Is My Password to test it. The site will tell you how long it will take a computer to hack your password. According to the site, it would take a computer 5 years to crack this password. I think  I can do better. By adding another 7 at the end, it now says it would take 200 years. 

You can create an algorithm that works for you. 

Monday, December 11, 2017

Turn Any Presentation Into an Interactive Presentation with Nearpod

@joe_edtech/@LisaBerghoff

Powerpoint slide shows are frequently used in classes. Those slides are great for keeping us teachers on track during class, especially when there's a lot to do.When I have used slides, the main purpose of those slides is my own, not really for my students. 

In class, I really want the students to engage in the conversation with me. I dodn't want them to just spew historical facts back at me, I want them to think about situations, try to understand why people act the way they do, postulate what they might have done differently, and so on. But what I mostly see when I use PowerPoint is a furious dash to write down every word that is printed on the slide as if it were Gospel. And why do they do that? Somewhere along the line they learned that what was important in class would be on the next exam, and everything that was on the next exam would be written on the board or included in the slide show (and yes, I'm sure that I was complicit in that at some point).

Nearpod is a Web 2.0 tool that offers us a chance to change the game a little. If you use Nearpod, and your students download the app to their Chromebooks, you can push presentations to them so that each slide appears on the screen of their device. If they are of the type that wants to write down every word, they can actually just take screenshots and go back to engaging in the discussion in class. Not only that, though, Nearpod gives you a chance to insert polls, quizzes, and other interactive slides into your presentations. With all of the power of a student response system, you can embed formative assessment into your classroom presentations and ensure some level of universal participation. You can even have students create drawings or graphs using their track pads, and share individual drawings to the entire class.

At the risk of being accused of burying the lead, though, Nearpod also serves one other purpose for your 1:1 classroom. While I am still of the mindset that the best way to make sure that your students aren't distracted by the technology is to be engaging with your teaching, teachers who are new to the 1:1 environment often cite classroom management/device management as one of their major concerns. If you use Nearpod for classroom presentations, you can easily see which students are actively engaged in your classroom activity. There is even an "attendance" button on the top left of the teacher screen that lets you see if any of your students have navigated away from your Nearpod presentation. So, while it doesn't lock your students into one screen, it gives you clear evidence of who is engaged in the lesson, and who is not.

Here is Nearpod's short explanation of how it all works:


On the upside, Nearpod continues to offer updates that make the product better and more efficient. With a free personal account, you can present PPT presentations or presentations saved to PDF. You can also share those presentations with other teachers. Additionally, the company recently rolled out a feature that allows students to see quiz and poll results whether they are seeing a teacher led classroom session or an asynchronous session. On the downside, they would really like for you to pay for a school or district license, which really means that storage is limited in the free version. But, this is a pretty decent tool to use in a 1:1 classroom no matter which device your students are using.

--------------------------------------------------------------------------------------------
Have you used Nearpod with your class? Or do you have another classroom presentation / classroom management tool that you use? Tell us about it in the comments section below.

Monday, November 27, 2017


Teaching The 4C's With Applied Digital Skills

@LisaBerghoff/@Joe_EdTech

Special thanks for contributions from @MrAguina

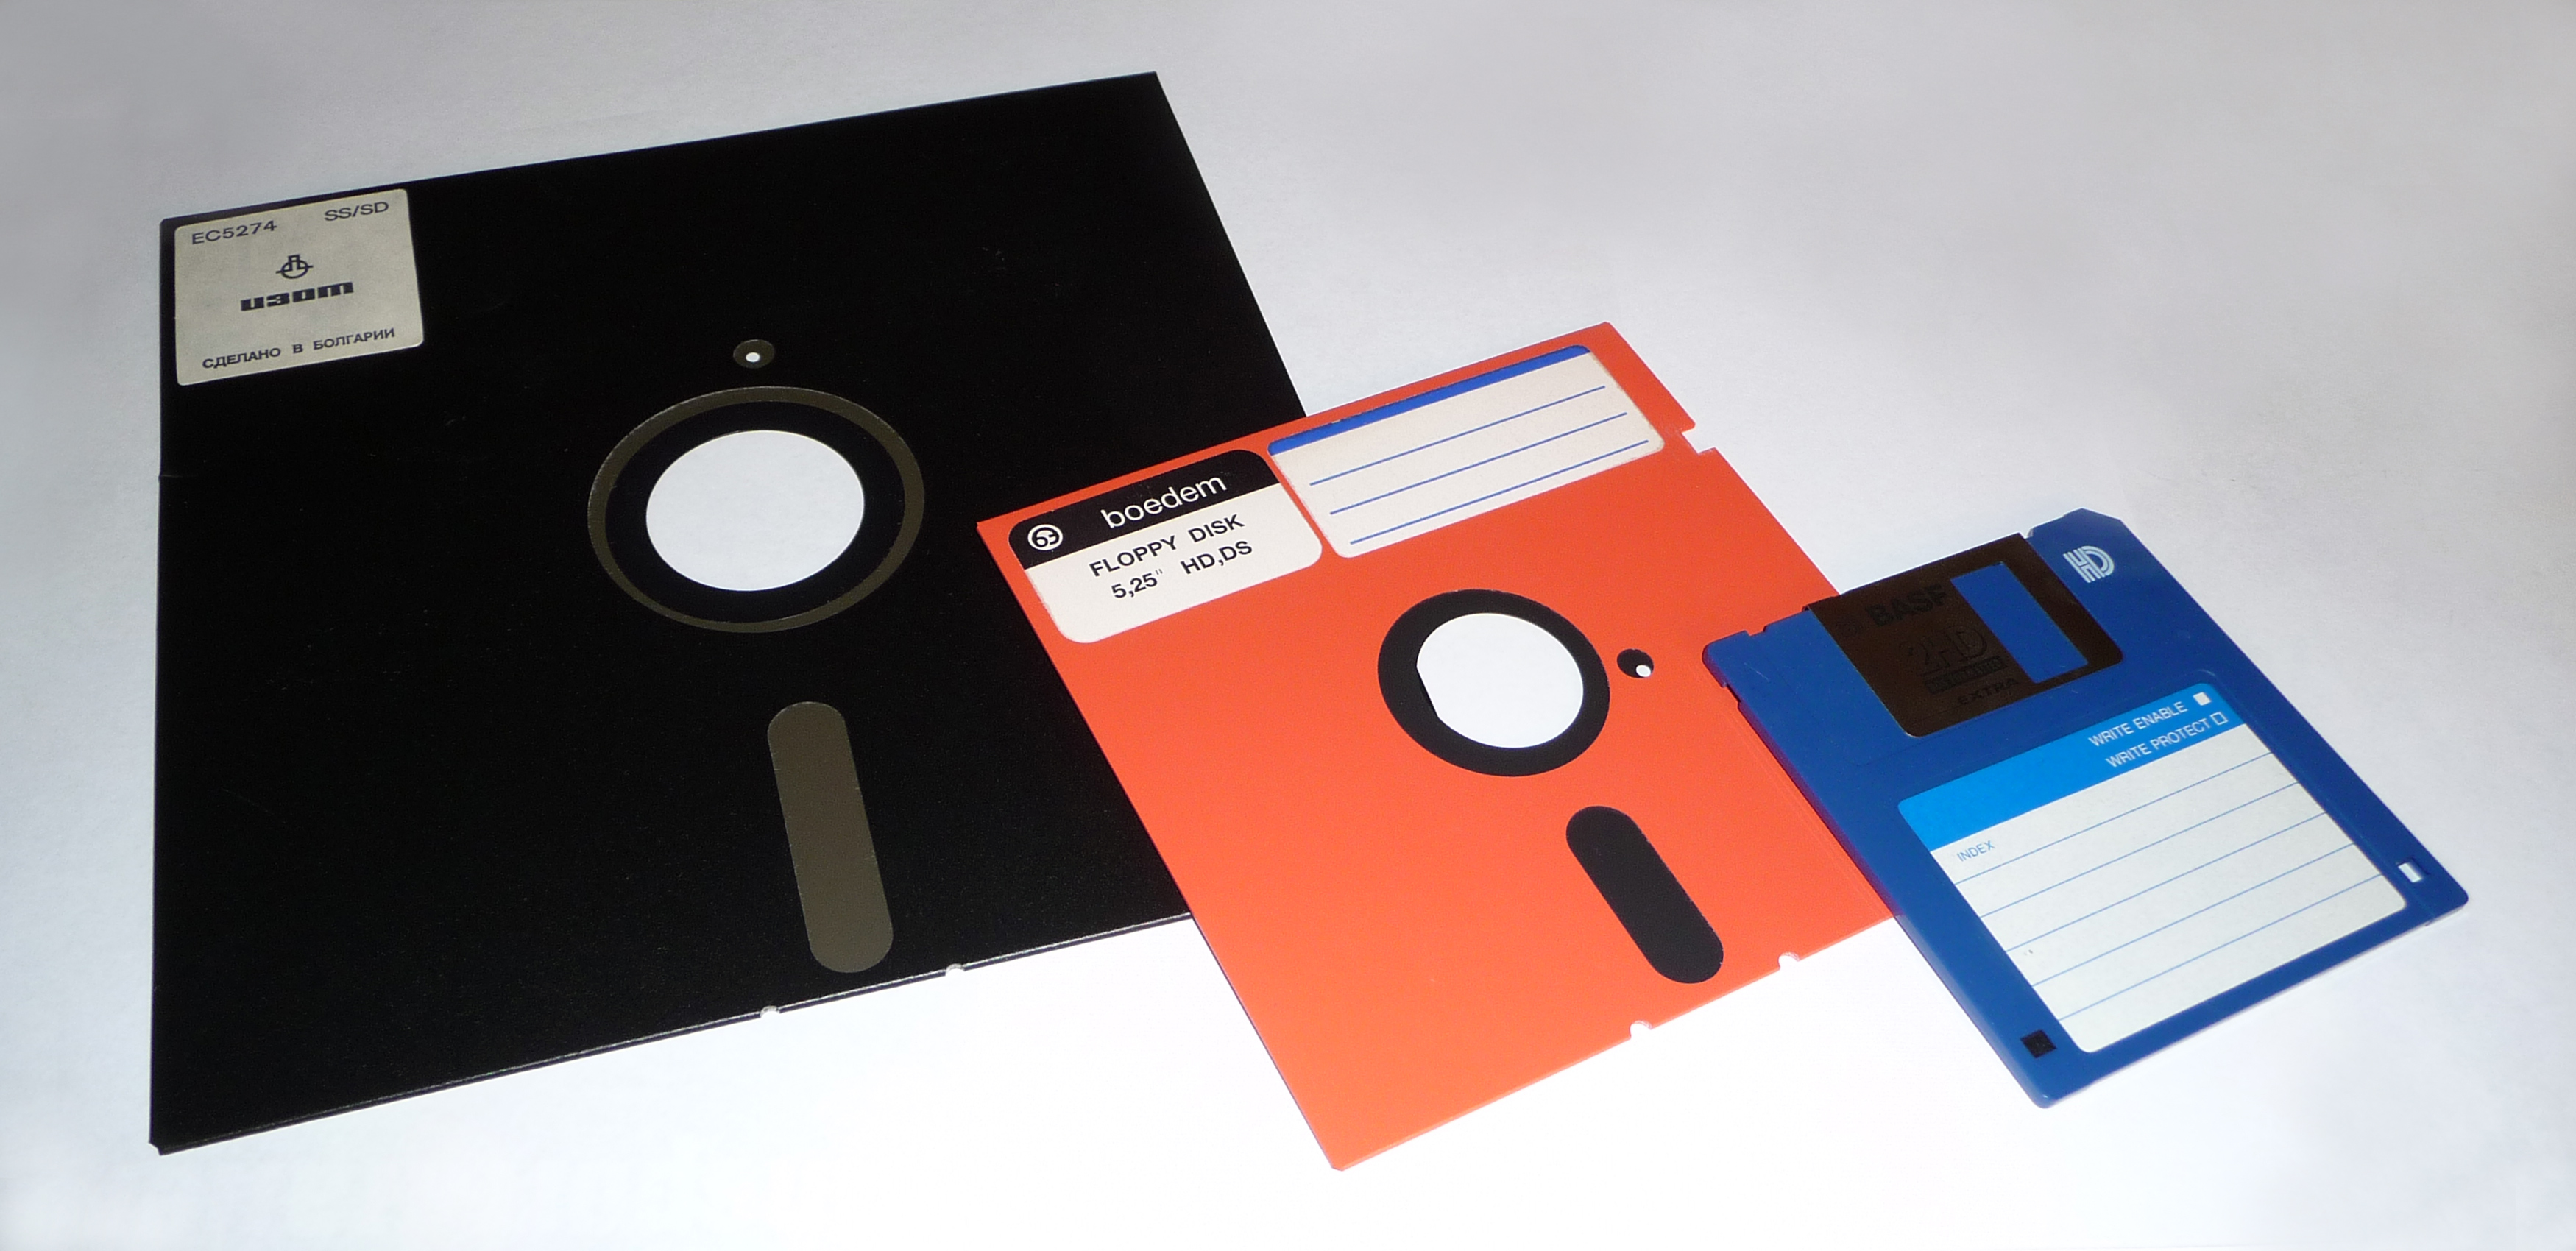
Open-Source Image from Shutterstock.com


Since next week is Computer Science Education Week (also known as Hour of Code Week), I thought it would be the perfect time to discuss one of the elephants in the room when it comes to technology.

We all know that our students are skilled Snapchat users but where will that skill get them later in life? According to a Pearson LearnEd article, 65% of today's 12-year-olds will have jobs that don't yet exist.  I know that for several years the idea of "digital natives" (them) vs. "digital immigrants" (us) was something that was widely talked about and understood. After all, for my entire childhood if I took a picture I had to wait for the film to get developed to find out if it was any good. My own children have not experienced a pay phone or wondering what time the taxi will actually show up.

However, just because they grow up with this stuff does not mean they intuitively know how to use it in ways that will prepare them for the job market of the future. 


So at this point, you are probably thinking- But I'm not an expert in using digital tools for the future job market! There's a good chance many of us are not experts in using digital tools for even the current job market.  We also know that it's not really about the technology tools. Those tools are going to change and evolve over time. The focus is now on the 4C's: Communication, Collaboration, Creativity, and Critical Thinking. So the question is- how can we prepare our students for the future?

No need to panic, Google has come up with a new curriculum called Applied Digital Skills. It is a technology curriculum for practical problem solving with digital tools. It is completely free and it is designed to be an in-person, blended learning environment where students practice life skills while they solve problems and build projects together using Google apps.  Applied Digital Skills was created for middle school, high school, college, and adult learners.
Here is a 1:30 minute video explaining what it's all about.


The problem-solving format of the units keeps the information engaging and relevant. The blended learning platform includes video content, peer mentoring and collaboration, and teacher facilitation and support. Good digital citizenship and ethics gets woven into the curriculum as opposed to a stand-alone lesson which helps students understand these concepts in a very real way. 

Even though Applied Digital Skills is a comprehensive curriculum, teachers can pick and choose what they want to use and when they want to use it. You can find units that already fit nicely into your existing curriculum and work it in. Each unit lists the skills that are being worked on, the number of activities, and about how long it should take to complete. Some of the units for high school include: If-Then Adventure Stories, Research and Develop a Topic, Technology, Ethics, and Security, Plan an Event, and Pick The Next Box Office Hit. There are about 15 units to choose from for the high school level.  Here is what the first unit overview looks like:


Getting started is easy! You just go to AppliedDigitalSkills.withGoogle.com and use your school credentials to sign up. Once you have created a class, you can give the class code to your students. You will have access to their data so you can keep track of their progress. Google has even created rubrics for you to assess your students. Everything is built in and easy to access. The curriculum has earned the "Seal of Alignment" from ISTE (the International Society for Technology in Education) which means it has been vetted as a tool that is not just fluff, it actually will help move students to a place where they are able to navigate the skills they will need, both digital and non-digital, to be collaborative problem-solvers. 

Here is a sneak peek at one of the unit's introduction videos. This unit is called Using Programming To Automate Tasks. It gives students a taste of what it's like to program in order to automate something that is useful to them.


I definitely encourage you to check out the curriculum. While it might not seem like your particular area of discipline fits in with Applied Digital Skills, I think you will be pleasantly surprised. There are practical applications that can be utilized across many areas and the more we all can work together, the more connections our students will be able to make.  

There is lots of help built in but if you want to work on this curriculum together, or you just want to take a look at it, feel free to contact me!

Are you already using Applied Digital Skills? Feel free to comment below and let me know how you are incorporating it into your everyday curriculum. 


Tuesday, November 21, 2017

Picture Credit Jzmiyarch (Talk | contribs) from Knowledge
Network by and for Educators
Technology Enhanced Formative Assessment

@joe_edtech/@LisaBerghoff

Early in my career, I was having a conversation with the best Division Head I've ever had (It isn't a secret - her name is Elaine Steele, and she was Div Head for World Language/Social Studies/ELL/Health). I was excited about a lesson I had just taught, and I told her that the students had really seemed to grasp the concepts I was discussing. She said, "So, how do you KNOW that they got it?" I was going to talk about the answers that I got from some of the kids in the class or the fact that so many were nodding their heads in agreement, but she had me. I didn't KNOW. I certainly didn't know that they ALL had it. That one question from Elaine changed my practice.

From that point on I really spent some time studying formative assessment in the classroom. I believe strongly in Assessment for Learning, or "the process of seeking and interpreting evidence for use by learners and their teachers to decide where the learners are in their learning, where they need to go and how best to get there" (Assessment Reform Group, 2002). Back in the day, that was something I did on paper. The process is so much simpler and can be so much more valuable now that we have Chromebooks and other networked devices to help us.

We recently had a PD session at DHS based on some research around Technology Enhanced Assessment for Learning. The researchers, Beatty & Gerace (2009), basically suggest some of our best teaching happens not when we instruct and then ask questions, but rather ask questions and use those as a context for sense-making and guided instruction.

The PD session looked at a variety of tools for quizzing, polling, ideation, direct classroom instruction, and facilitating discussion. Most of the tools have been written about by Lisa or myself at some point in the last couple of years, but many of the tools have been improved to make function better in the classroom. For instance:
  • Google Forms were updated last year to make quizzing easier. They keep getting better and now allow for the inclusion of open-ended questions as well as objective questions.
  • Poll Everywhere has not only added new output features (simple graphs, word clouds, etc) but has also upgraded to include a feature which allows teachers to collect screen names and moderate posts.
  • Padlet has an entirely new platform that makes it easier to build, modify, and share projects.
The presentation below includes some of the discussion around formative assessment and a huge list of digital tools to use in the classroom. Each one of the tools includes a link to the tool itself and a link to instructions and examples. On slide 8, the "About" link will take you to the tool and the official documentation for the product. The "How To" link will take you to instructions. In many cases, the instructions come from featured articles in this Blog, but we've linked to videos or other teacher sites if there is new information out there.

How are you using Formative Assessment in the classroom? Are there some additional tools we should include? If so, please tell us about them in the comment box below.

Monday, November 13, 2017

Google Calendar Gets A Redesign

Google Calendar is a G-Suite app that was unveiled in beta back in 2006 and became officially out of beta in 2009. Given the speed at which technology moves, it's definitely time for an upgrade. The good news is that Google calendar is efficient and easy to use for time management and scheduling and this redesign does not drastically change the functionality. The interface is just a little more user-friendly and there are some nice additions that I'm excited to tell you about. 

If you have been using the Google Calendar mobile app, the new look with be very familiar to you. The first thing you will notice is that the colors are brighter and events are easier to read. 


Here's what is new in Google Calendar:

1. Event Details At A Glance

Click one time on an event and you will be able to see the details of the event including the list of invitees including who has rsvp'd, attachments, video call links, rooms, and locations. 
If you right click on the event, you can quickly change the color, quickly join a meeting, or delete it.


2. Quick-Add Events

Click on an empty space on the calendar to quickly add the name, time, and calendar that the event belongs to.

3. New View Options

You can now see events by invitation status. Events that you have accepted will show up in a solid color, if you responded "maybe" there will be diagonal lines across it, and events that you have not yet replied to will show up with an outline. If you declined the event, you will see an outline and there will be a line through it.
You can also decide how you want to see your calendar. There are options to view by schedule, day, week, month, year, and 5 days. You can choose to have weekends hidden too. 


4. New Settings Page For All Calendars

You can now adjust the settings for all of your calendars in one place. Click on the gear and then click "settings". There, you can make all calendar adjustments. Click on individual calendars to adjust notifications, sharing permissions, and more. 

5. Add formatted notes, attachments and links to events. 

All of your notes and details will be visible when you click once on the event and the quick detail view pops up.

6. Other tips and tricks to know!

  • You can now see side by side calendars in "day" view! Find a time to meet easily.
  • You can email all attendees right from calendar. Click to view the event and then click the envelope icon to email.
  • You can view and restore deleted items in one spot. click on the gear and go to "trash"

7. Extra Credit Bonus Fun-

Type in  "Thanksgiving Dinner" and then click on the saved event and see what happens!

Remember! This is a web-based calendar tool. There is very little you can do to actually mess it up. Don't be afraid to click and see what happens.

Remember: menus are hidden behind 3 dots. 
Are you already using the new Google Calendar for your personal use? Let us know your favorite features. 
As always, I'm happy to help!


via GIPHY

Tuesday, November 7, 2017

Working More Efficiently with Clipboard History 2

@joe_edtech/
@LisaBerghoff


I know that you usually turn to this blog for deeply profound ideas that bring innovation and revolution to your classroom. Well, not today. Today's blog post is all about solving a common technical problem that adds many frustrating seconds of mind-numbing work to some of my tasks. 

It's the WORST. I select the text of a long message I'm going to send to someone, right click and copy. Then I copy the email address of the person I'm sending the message to. The problem, and it is real, is all the text I just copied is gone! Then I have to reopen the document, reselect the text, right-click, and recopy. That's at least 4 clicks!

If you go to the Chrome Webstore and download Clipboard History, this first world problem will no longer be yours. Now every time I copy something to my clipboard in Chrome, it is saved and easy to retrieve. Now there is a clipboard icon in the list of extensions on my browser that stores all of the text I've copied recently. 

Honestly, I will frequently compose email messages, or direction sheets, with information from several different webpages or product reviews. I no longer have to worry about having all of those pages open while I compose the message. Once I copy the text, it is saved and ready for me at any time.

Click on the Clipboard icon, select the text you want to copy, and paste into your document. You can mark items as favorites and use them frequently (regular opening to an email or response to a question) or save certain clips to the cloud for long term use. 

OK, this might not be revolutionary. But it is a pretty cool little extension. And I use it a lot.
--------------------------------------------------------------------------------------------------------------------
Do you have a time saver Chrome Extension? Tell us about it in the comments below.

Monday, October 30, 2017

Get Everyone On The Same Page: Share To Classroom

@LisaBerghoff/@Joe_EdTech

More and more teachers have been using Google Classroom because it serves as one place for students to access what they need for our classes, it is easy to use, and allows us to communicate with our students without the need for email. With our 1:1 devices, teachers are finding new ways to make sure our students are engaged and interacting with information. Learners are able to access information quickly and then use critical thinking skills to solve problems with their new knowledge. As teachers, we often get excited when we find new sites or tools to use in the classroom. One issue, however, is how to get all of our students to open the webpage when we need them to. Gone are the days where you need to write an entire URL on the board and have the students copy it down and enter it, exactly, in order to get everyone on the same site at the same time. That never seems to go well. If you are a Google Classroom user, you will no doubt find the Share To Classroom extension to be very helpful. This extension will enable you to send a webpage to your students and have it open up on their chromebooks right before your eyes. It also allows you to post announcements, assignments, or save webpages to be pushed out at a later time. Students can also share webpages with their teacher using this extension. 

Quick Lesson: Application vs. Extension vs. Add-On 

We use these terms a lot and it is important to understand what they do and where to find them.

Application (App): 

Web apps are basically websites. They have functionality within your browser and run without the need to download software. Gmail and Google maps are examples of web apps. In the chrome web store, you can choose web apps that are websites and chrome apps. Chrome apps are basically software programs that often can run even if you are not online. There is a gmail chrome app that you can get from the chrome web store that will allow you to access your email offline (limited functionality). Your apps that you have added from the chrome web store can be found in your apps doc in the upper left corner of your screen.

Extension: 

Extensions function while you are using an app or a website. They enhance the functionality of the tool you are using. The Share To Classroom extension allows you to access your Google classroom while you are on another webpage. The extensions show up as little icons to the right of the URL bar. Fun fact: The URL bar is called the omnibox.

Add-On:

Add-ons are similar to extensions, but they are scripts that only work within certain applications. For example, there is an add-on that will allow you to send emails from a Google spreadsheet. It enhances the functionality of the app but it only works in sheets. 

Ok, back to Share To Classroom...

Step 1: Go to the chrome web store and add the Share To Classroom extension. When you add it, you will see the little green icon pop up on the upper right of your screen. 
Step 2: Have all of your students also add the Share To Classroom extension. It will NOT work unless everyone has it.
Step 3: When you are on a webpage that you want to send, click the little green icon for the extension. The extension will show up as long as you are signed in to your district chrome account.
Step 4: Choose a class and then click "push"

That's it! 
Below is a screenshot of me pushing the Yellowstone National Park website to my biology students.


There are lots of practical uses for this extension. What I like most about it is that with technology we often miss the step of how to get the information to our students and that is when we lose instructional time. There is no need to spend time trying to make sure your students are all on the webpage that you want, just open it for them using Share To Classroom.

Here is a short video from The Gooru, showing how it's done...


Are you using this extension? Do you have other extensions that are working great for you? Feel free to post in the comments section below. 


Tuesday, October 24, 2017

Image from New Visions Cloud Lab

They Completed Your Google Form. Now, How Do You Read Their Answers?


@joe_edtech/
@LisaBerghoff


This year, your students will sit for HOURS completing the PSAT, SAT and ACT assessments. One of the reasons the State and Federal Governments have adopted such tests is that they are incredibly easy to grade - objective tests with a lot of selecting the right answers. All you have to do is run the answer sheet through a simple computer program and you have mountains of "achievement data" to turn into color-coded graphs.

In the real world, and in the classroom, answers are not always objective. And most teachers want their students writing critically and creatively. Ask any Google Apps for Education teacher and they'll tell you that forms are the most efficient way to incorporate assessment for learning into the classroom. But, have you ever tried to read a free response answer or an essay on a Google Spreadsheet? If you have, you just winced. If you haven't - DON'T DO IT!
Save as Doc Add On

The Google Add On Store offers two great solutions for taking the written information in Google Form Response Spreadsheets and turning it into something useful. The first, and easiest tool is called "Save as Doc." This Add -On takes a column from a spreadsheet and saves the data in a very readable Google Doc. (See below for a demonstration of the "Save as Doc" Add On.) "Save as Doc" is probably best used if you want to generate a discussion with a group or quickly glance through answers to check for understanding. At a recent workshop, I had teachers fill out a form on which they wrote down some ideas they have about student grades. Rather than opening the results spreadsheet, I used "Save as Doc" and displayed the anonymous answers to the group to generate a full discussion.


The other Add On worth discussing is a little more complicated, but is perhaps my favorite Google Tool, and will prove worth your time to learn and utilize. autoCrat, by New Visions Cloud Lab, is a tool for merging data from a spreadsheet into a Doc or into another spreadsheet. Imagine giving your students an online quiz using Google Forms and having a Google Doc generated for each student with their answers displayed in an easy to grade, easy to comment, and easy to share way. You can also use autoCrat to create certificates or mail merge letters. Written directions for autoCrat can be found on the New Visions Cloud Lab page, or you can watch the video, created by Brent Coley, embedded below for step-by-step instructions:

--------------------------------------------------------------------------------------------------------------------------
One of the benefits of being a part of the Google Apps for Education Community is that all GAFE Teachers and Trainers create "how to" materials for using Google products. While the first video is mine, the second video is posted by a fellow Google Education Trainer. If you find another good video tutorial for a Google Add On, please share it with us in the comment box below.

Monday, October 16, 2017

Annotate, Highlight, and Mark Up PDF's With Kami


@LisaBerghoff/@Joe_EdTech


One of the most common tasks that teachers and students look to do when dealing with digital text is to be able to annotate, highlight, and mark-up a document. I personally like to highlight and annotate on paper, it is how I learned to annotate when I was in school.  However, I also really like having my documents available without needing to carry folders or binders with me. It is empowering to be able to access my documents from any device that has internet capabilities. While I like to say we should use less paper instead of being paper-less, there are times when we need our students to interact with text in ways that can be tricky online. For students who struggle with fine motor skills, keeping track of their books, or who benefit from the text to speech features that work with chromebooks, there is a tool that works beautifully.


One of the most popular chrome pdf apps is Kami, which means paper in Japanese. It supports pdfs, documents, and images. The list of tools is vast and includes a PDF and document viewer, highlighter, ability to add notes, underline, and more. Work that is done in Kami can easily be shared with others.   For teachers, Kami is helpful when looking at online resources like e-books and publisher-supplied PDFs. This is a freemium app that has a "teacher plan" with more features.

From KamiHQ.com

Instead of printing or copying worksheets, give Kami a try. To get started, get Kami from the chrome web store.  There is also an OCR tool. OCR stands for optical character recognition and it basically takes the text from PDFs and images and the tool converts the text into an editable format. When the app is open, you can drag and drop the file into the OCR tool and then it is ready to be read and annotated online.


Are you using Kami for PDFs online? Post in the comments section and let me know how it's going!


Tuesday, October 10, 2017

Google Drive
Two Tools: File Creation and File Storage 

@joe_edtech/@LisaBerghoff


Most people know that Google Drive is the online tool that allows your students to make collaborative documents, slideshows, and spreadsheets on their Chromebooks. I think many of us have also been using the tool frequently too when we want to collaborate with colleagues or survey students using Google Forms. But, it is really important to remember that Google Drive was designed to be two things, a place to create Docs, Sheets, and Forms, and a place to store ANY file. You do not have to convert files to store them on Google Drive. Literally any digital file can safely be stored in Google's Cloud and since we use Google Apps for Education, we have unlimited Google Drive Storage. Everything you've ever created on your computer can be stored in your school Drive Account and accessed by you from any computer.

Files that are stored in Google Drive do NOT have to be opened using Google Apps. I store Illustrator files in Drive, but I don't open them with Google Docs. I open them in Illustrator to edit them.

Google Drive is just a fancy way of saying Cloud Computing, but for those of us that don't live in the computer world, Cloud computing can be a scary and confusing topic. Last year, I wrote another blog entry here that summed up Cloud Computing pretty well:

There are many things that I get nostalgic about when I think about the 80's and 90's. Floppy disks, however, are not in that category. Today we have many options for cloud storage. The latest and greatest of those is Google Drive. Here is a 2-minute video that explains the cloud. So many of you have asked and it's a great question. 


Why Would I Store Files in Drive?

The basic answer to this is that you have unlimited storage and you can access your files from any device that you own. Unlike with the old File Share option, you don't need anything special set up on your computer. You simply need to log into your Google Apps account from any device. When I go to visit my parents in Florida, I no longer take my computer with me. I don't need it. If I'm in a jam and need to access one of my files from school, I can log into Drive on my Phone and get what I need.

The biggest objection I hear to storing files in Google Drive is that some people don't want to change formats. Well, you don't have to change formats - not even from Word to Docs. In your Drive Settings, simply uncheck the box the box next to "Convert uploads," and your files will stay in their original format.


Both Deerfield and HPHS will be offering more training on Google Drive in the next few weeks. And you can always contact Lisa Berghoff if you have questions. But, the good news is you don't have to wait. There are literally thousands of help videos online that can answer help you answer any question you may have or provide you with a tutorial on getting started with file storage in Google Drive.

Here's an example Published by Anson Alexander from http://AnsonAlex.com.


---------------------------------------------------------------------------------------------------------------------
Some of you have been using the Google Drive App on your computer so that you don't even have to go through the Web to access your files. That process is getting even better with Drive File Stream. Look for an update on that very soon!

Monday, October 2, 2017

Don't Just Watch, 

Engage, With EdPuzzle

@Lisa Berghoff/ @Joe_EdTech


I am definitely dating myself here, but I grew up watching Mr. Rogers' Neighborhood. I used to love watching the beginning of the show, after he changed out of his suit jacket and into his sweater and after he changed into his sneakers, he would talk about what he was up to that day. He would look right into the camera and ask us questions like: Do you ever wonder how pencils are made? or, Have you ever planted a seed? He would pause for a moment, giving us kids a chance to think about the answer. Sometimes my sister and I would even be compelled to answer out loud. Watching Mr. Rogers was more than just a passive exercise in consumption of content. He was a master at getting us to pause, reflect, and even respond. 

Since we have become a 1:1 chromebook school, with each student having their own device, teachers are utilizing more and more video in their lessons. As our students are watching videos, we want them to interact with the content. We want them to reflect, be thoughtful, and make connections. In short, we want to turn a video into a lesson.

EdPuzzle is a platform where you can turn any YouTube (or other) video into your next lesson. It is super simple to set up, the analytics tell you if your students are interacting with the video, and it is easy to share lessons with colleagues. Also, I should mention that it is FREE! Another bonus is that it works seamlessly with Google Classroom. 


According to EdPuzzle, more than 84% of students use YouTube to help them with homework. The nice thing about videos is that they allow students to learn at their own pace. They can pause or re-watch videos, which they cannot do during your class. Using video in this way allows students to have some control over their learning. 

Here is how EdPuzzle works.
Step 1:  Upload or choose a video. Built into the EdPuzzle platform is a whole list of places to find great educational videos including YouTube, Khan Academy, National Geographic, TED, etc. You then have the opportunity to crop the video. If you have a long video, you can easily crop it so your students will only see a portion of it. 

Step 2: You can add an audio track to the video. If there is something that you want to explain in your own words, you can record it right in EdPuzzle.

Step 3: Now you have an opportunity to add audio notes. For example, you can add an introductory comment that will show up before the video begins. 

Step 4: At this point you can add questions to the video. As your students watch the video, it will pause and your questions will pop up. You have the option of adding open-ended questions, multiple choice questions-if you choose this option you can make an answer key and it will auto-grade for you, or just insert a comment which can have a link, an image, an equation, or text. 

Step 5: Once you have your video lesson set up, you can assign it to your class. It will automatically assign in Google Classroom or you can give your students a link directly to the video. You can assign it with a due date and you can also check a box that will prevent students from skipping ahead in the video. When you assign it to a class, you can track student answers, see who viewed the video and how many times they viewed it.

Are you using video in your classroom? What tools are you using? Go ahead and post in the comments section and share what is working for you. 


Tuesday, September 26, 2017

One Tech Tool That Solved Two Problems:
cloudHQ Gmail Label and Email Sharing

@joe_edtech/
@LisaBerghoff

I've always been a fan of serendipity. But I'm getting ahead of myself. Over the summer, a friend of mine said that she really needed to share a folder of emails (in Gmail, it is called a Label) with a colleague. She wanted to be able to do that without opening each email individually and forwarding it. I did a quick search and found cloudHQ, a Chrome extension with great reviews that purported to do just that. So, I installed it - then I found out it was even better than advertised.

Once installed and activated (it may ask you to sign in and authorize it multiple times) you'll see a new button at the top of your Gmail inbox.


It is pretty simple to use. Once you have authorized the extension and click the button, you'll get a pop-up box prompting you for the name of the label you want to share and the email addresses of the people with whom you want to share. 

If that were the end of the story, it would be good enough. But it gets better. When you install the extension and open an email message, you'll see an entirely new set of menu options:


In addition to the usual choices, you have the option to change the name of the email (the pencil icon), share a link to the email (the chain link icon), or SNOOZE the email (the alarm clock icon). I personally don't have any use for the first two, but I've been looking for a good option to snooze emails for a long time. If I get an email in my inbox that requires some action on my behalf, but the action isn't required for a significant amount of time I can click the snooze icon and hide the email until it is important. 

You can choose from a list of preselected Snooze times, or you can select an exact date and time. The email will be hidden until that time and will then appear at the top of your inbox. 

cloudHQ is a "freemium" service, but I only use the free stuff. If you run your own business or have run an organization outside of school, it might be useful to look into the paid services for syncing and backing up emails. I would love to tell you that I researched this tool and knew all of this in advance of sending it to my friend. But I didn't. It was just serendipity.

-----------------------------------------------------------------------------------------------------------------------
If you've found a better way to share labels or snooze emails, tell us about it below.

Monday, September 18, 2017

If This Then That... Do More With Your Apps And Devices

Do you ever wish you could clone yourself?


I spend a lot of my time thinking about how to streamline, be more efficient, make better use of my time, and get more done without adding hours to the day. It seems impossible. There are always emails to respond to, Twitter feeds to check, weather reports to look at, photos to catalog. Now that I have found IFTTT, I almost feel like there are two of me:)

IFTTT stands for If This Then That and it is a free platform, launched in beta back in 2010,  that helps you do more with your apps and devices. It uses a formula called an "applet" that connects a service (everything from email, Twitter, Facebook, Time Magazine, Fitbit, etc.) to a "trigger" or a condition and then another service. I know it's tricky to understand at first but this service has amazing possibilities. I worked with a teacher who was teaching an outdoor adventure-type of physical education class. He wanted a collection of his students' photos on their camping trip and he wanted a way for them to comment and share. He had them post to Instagram using a specific hashtag he created. He used IFTTT to automatically upload the photos with that hashtag to his class blog. AMAZING!

Here are 5 examples of applets that already exist that you might find interesting.

1. If you get an email with an attachment, then it will save to your Google drive. This applet can be
helpful when you are trying to organize attachments that you get via email. This applet will automatically save those attachments for you. Once the applet is active, you don't need to do anything except enjoy your great new organization system!


2.  Sometimes the best information comes not from the conference, but from the tweets sent out using the conference hashtag. But who has time in the day to load, 
look at, and read all of those tweets. They come fast and furious once the conference gets going. This applet will automatically load tweets with a specific hashtag to a Google spreadsheet. You can look at them when you have time or just save the spreadsheet for future reference. 


3. I happen to love quotes! I use them in my classes with students and I share them with friends and colleagues. I don't always have time to look at or save the quote of the day from BrainyQuote. This applet automatically archives quotes for you in a Google spreadsheet which is automatically saved in your Google drive.


4. Not sure what to do with all of those photos on your camera roll? They are taking up space on your phone. This applet will automatically upload your camera roll to your Google drive. Automatic storage solution! I also happen to take a lot of screenshots on my phone. There is another applet (bonus) that will save those screenshots into their own folder. 


5. This is one of my favorites. Every day at 6pm, or whatever time you specify, the weather report will be automatically added to your calendar. Never get stuck without your umbrella again!


Ok, hopefully you get the idea here. These are just a very few of the many, many applets that IFTTT has to offer. If you don't see what you are looking for you can easily create your own. IFTTT walks you through how to make your own applet by connecting your services and devices by a trigger. If you are someone who uses any social media, there are many applets to help you streamline those posts. There are applets for voice assistants like Alexa or OK Google. I highly suggest that you take a look at the applet collections by clicking here. 

Are you using IFTTT? Post in the comments below and let me know what applets you have activated.

Tuesday, September 12, 2017

Newsela Helps Make Reading the Most Powerful Learning Tool. 


Reading is one of the most powerful learning tools we have. It is also one of the greatest barriers when it comes to our students who struggle. Students who have difficulty reading often cannot access the curriculum they need in order to learn. Newsela is one of those magical tools that makes it possible for struggling students to hang in there with the class in a way that empowers them, instead of belittling them. I can remember being in elementary school and we had reading groups. It was very clear who were the great readers (the barracuda group) and who were the not so great readers (the minnows). I'm glad to see that those days are over but teachers still struggle with how to get content to our students in a way that they will understand.


Newsela  is a website that has a huge collection of current events articles from real sources like the Associated Press and Washington Post. Each article can be adjusted to 5 different reading levels. The students can select the level, or language, that is most comfortable for them. The content is the same.The articles come with eye catching photos and it shows you how many times the article has been assigned. The article also has grade level information and the word count. Students are able to adjust the reading level right their on  their own  screen. There is also an easy print option. 

Newsela is free and works seamlessly with Google Classroom. They also offer professional development webinars on literacy in addition to supports and resources for teachers. In addition to the latest news, you can search the Newsela library for content-specific articles. The students are in control of the reading level and the content doesn't change so even your minnows will be able to chime in during class discussions and activities.

When you sign up as a teacher, you can either create a class or import from Google Classroom. Newsela also allows you to create text sets or choose from the ones that are already created. This way, you can offer your students a whole group of articles to choose from. This will help you get some instructional time back if you were planning on having students search  on their own. There are even activities included where you can have students write by responding to a prompt, or take a short quiz.

Do you  already use Newsela? Write in the comments feature below and let me know how you have been using it!

Monday, September 4, 2017

Google Forms Turned Up A Notch! 

Password Protect and 4 Other Amazing Google Forms Tricks


Google forms are arguably the most transformative edtech tool in use today. They can be used for so many purposes. From submitting assignments, formative and summative assessments, and good old fashioned surveys,  to taking attendance at club meetings and opinion polls, Google forms are widely used by both teachers and students. It's no wonder, they are simple and fast to create and user friendly for the responders. The team at Google has been making a few adjustments to Google forms that you might not know about.  Some features are still being rolled out. 

 Sit tight because these 5 tips might make your head explode!


1. Password Protect Your Form With Response Validation

Don't want just anyone to be able to access and complete your form? No problem, you can create a "password" by using response validation.  This one isn't really so new but many people don't know about it. 
Here's a pictorial of the 3 steps to follow:
1.Just click the three dots next to the Required tab and click response validation. Make sure you are in short answer mode. Don't forget to make the question required. 
2. Here is where you can set the parameters. 
3. For a password, set it to "Text" "Contains" and then enter the password EXACTLY how it must be entered to use.  Where it says "Custom Error Text"  write in something like- wrong password, try again. 

2.  New Question Type: The Checkbox Grid


This new type of question option allows your respondents to choose from multiple options in a table. This is really helpful for things like finding meeting times. You set the rows. The example here shows the days of the week. You then set the columns. The image here shows one with class periods on it. 


Here is what the checkbox grid looks like to the respondent. I could see this being used in many ways for multiple disciplines. I'm thinking characters and traits, equations and properties, figures in history and events. I know you will put this one to good use! 


3. File Upload Capabilities:

Finally! Our suggestions have been heard and Google has added the ability for respondents to upload a file into the form. When you add a question, just choose "file upload". You will see the options below. Everything from an image, PDF, video, audio file and more. You can have them add multiple files and set the maximum size allowed.

4. Give Feedback In Quiz Mode:

Of course you know that Google forms now has quiz mode where you can assign points and even give an answer key. The form will grade itself! If you set the grades to be released manually, the email addresses will automatically be collected AND you can give feedback within the quiz. When your students get their grades, they will see the feedback you left for them within the questions. 
Here is what the quiz settings look like:  


5. Set Preferences that will apply for ALL of your forms!

Are you sick and tired of marking every question as required? Well now you can set preferences for your forms. You can automatically collect respondent's email addresses, mark all questions required, and even preset point values for quiz questions. Once you set your preferences, that will be the default setting for all of your forms. Click the three dots in the upper righthand section of your screen and open Preferences. 

Here is what the preferences options look like: 

Coming Soon! Look for Intelligent Response Validation.


How are you using Google forms? 
Go ahead and post in the comments below.
Want to work on these together? I'm happy to work with you and show you how to use these features in a way that makes sense for you and your classroom.