Monday, December 14, 2015

Quizizz: Fun, Engaging, Multiplayer Classroom Quiz Games and Yes, Students Can Play From Anywhere!


@LisaBerghoff/ @Joe_EdTech

Quizizz: Fun, Engaging, Multiplayer Classroom Quiz Games and Yes, Students Can Play From Anywhere!


I'll admit that I can be a sucker for bells and whistles.  I love toys and games and fun in the classroom if they are used in a purposeful way.  When students come back and visit years after graduation, it's the funny, silly activities that they remember and connect with most.  Do any students come back and say "Remember that time when we sat in rows quietly and took notes?" I recently led a workshop and asked teachers from various schools to describe what their classroom looks like when their students are truly engaged.  Words like "active", "participation", "loud", and "excited" came up as the teachers thought about a time in their classroom when students were engaged. Of course, the topic of Kahoot often comes up during these types of discussions.  Remember the first time you did a Kahoot?  You will absolutely not get that kind of response when you assign a worksheet.  That's because tools like Kahoot are engaging and fun by design.  They allow students to participate in a way that does not require them to push too far out of their comfort zone, but still makes you feel like you are playing a game and taking a risk.  One of the most common questions that comes up with Kahoot is whether or not students can participate in these fun quiz games on their own or from home.

That is why I am thrilled to share Quizizz with you. 
http://www.slideshare.net/Quizizz/quizizz-presentation-49737217

Quizizz is  a free, online tool that allows you to create classroom game show-like quizzes.  Similar to  Kahoot, the students have questions and  up to 4 options for responses.  You can create your own or use one that has already been created.  You can even create your own quiz but then steal collaboratively take advantage of individual questions that other teachers have made and put them into your own quiz.

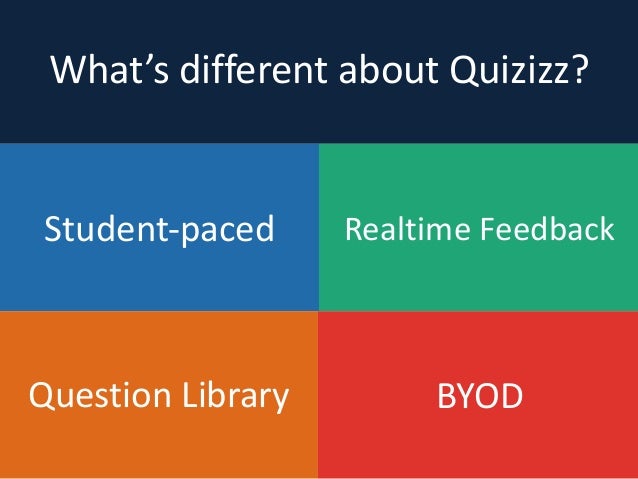
 There are several key features that make Quizizz different from Kahoot.  First, you can adjust the timer from 5 seconds to 15 minutes of time allowed to answer a question, or you can adjust the settings so the question timer is off completely. You can play the games live during class but allow students to play at their own pace because the entire question shows up on the students' screens.  The way Quizizz works is such that you can play at your own pace but still feel like you're playing against your classmates.  Quizizz also has a feature that allows you to assign the quiz for homework. There is a  calendar feature to set the days that the quiz is open and give your students the Quizizz code to join your quiz. It also has a meme generator that will give the students instant feedback by way of funny kittens and silly graphics. Another feature of Quizizz is that when students finish playing, they get valuable data showing how they did on each question. 

When your students first go to join.quizizz.com, they will enter the game code and their name.  In order to effectively grade the quiz, I suggest mandating a naming convention so that students must enter their first name and last initial or some other standard format so you will know who is participating.  The students are then assigned an avatar (mine was an adorable sheep with glasses) and then are prompted to proceed.  As students are answering the questions, they are given immediate feedback on how they did on each question.  Once they are done, they can see how they did on all of the questions and they can go back and review the questions.

https://twitter.com/quizizz/status/562659247066861568


As the teacher, you can pull up a "report" that shows the percentage of students who answered each question correctly.  You can also click on individual students to see how they did.  The reports page gives a very easy to read graphic so you can quickly see which of your students need more instruction. This type of formative assessment is quick and easy to put together, fun for the students, and very helpful you teachers as we make instructional decisions.


Quizizz can be used at any point during instruction.  You can then show the questions in slide show mode so you can explain and walk through the most missed questions.


Want to see more?  Here is a one minute video walk through of Quizizz.
You're Welcome!


What are some of your favorite tips and tools for classroom engagement?  Share in the comments section below. 

Tuesday, December 8, 2015

Better Writing Made Easy: Grammarly


Using Grammarly To Improve Online Writing

@joe_edtech / @LisaBerghoff

I grew up watching Kelsey Grammer playing Frasier Crane on tv, a character who frequently corrected people's grammar. Kelsey and I have some traits in common and I have often quoted his Frasier when I've had to do something uncomfortable or hypercritical, "It's like correcting people's grammar. I don't do it to be popular." Apparently, we share quite a few traits.
"I don't do it to be popular."

I've found that there are two types of people in the world. Type 1 will post something on Facebook confusing "their" with "there" and "two" with "to," and Type 2 will post a comment correcting both misspellings. I am Type 2, usually. 

Back in the day, we all learned grammar and usage by endlessly diagramming sentences on the blackboard. Then the world changed and Bill Gates taught everyone to rely on Microsoft Word to correct their spelling and grammar mistakes. Then the world changed again and we all started writing online - where there is no reliable grammar check! The horror!

Grammarly is a Web 2.0 program and a browser extension that can help civilize Internet writing. Once the plugin is installed, Grammarly can help correct your grammar mistakes in Gmail, on Facebook posts, in LinkedIn, on WordPress, or literally anywhere you write online. I'm sure it would work in Blogger if I needed it.  (Insert sly smiley face here.)

After you've installed the extension and created a free account, there are two simple ways to use Grammarly. Anytime you are writing online, you can simply click the extension button on your browser, and Grammarly will launch a grammar and spelling checker. Just like in Microsoft Word, Grammarly will underline detected mistakes and make suggestions. You can choose to accept Grammarly's suggestions or not. 

If you need something more, you can create or upload writing drafts to your account on grammarly.com. Online, you can use Grammarly's plagiarism checker and benefit from tools like the sentence structure suggestion. If you are working on something really important, and you purchase a premium account, you can even consult with one of their professional proofreaders. However, most people will be just fine with the free service they provide online.

The best solutions to your grammar, spelling, and usage problems are careful composition and meticulous proofreading. However, when you are writing quickly for a public audience, Grammarly can be a pretty useful substitution for meticulousness. 

---------------------------------------------------------------------------------------------------
If you've got some time, here is Dottotech's Review of Grammarly:

Tuesday, December 1, 2015

Easy On The Eyes! Read More In Less Time With Bee Line Reader


Easy On The Eyes! Read More In Less Time With Bee Line Reader

@Lisa Berghoff     @Joe_EdTech


In the past several years there has been a giant push for educators to have a better understanding of literacy skills.  We know that reading is imperative for learning and we know that comprehension plays a major role in multiple subject areas.  However, certain aspects of reading that often get overlooked are fluency,  decoding speed, and tracking ability, especially when dealing with reading digital text.  As more and more of our text is presented in digital format, it is necessary for educators to explore ways to help our students follow what they read with increased speed and decreased eye strain.  

Bee Line Reader makes reading faster and easier by making a color gradient that guides your eyes from the end of one line to the beginning of the next.  I have been using the Bee Line Reader for 2 weeks and this simple tweak does seem to be helping me with both focus and eye strain.  The Bee Line Reader is an extension that can be found in the chrome web store.   You can use it as much as you want for free for 30 days. After that, you can continue to use it 5 times per day for free or upgrade to the pro version.  

I believe that the Bee Line Reader can benefit all of our students, but it might be a game changer for our kids with dyslexia, ADD, or students  who struggle to decode. 

Here's the explanation of how it works, while using the Bee Line Reader:

Tuesday, November 24, 2015

Reading Tragedies... Wait, Are We Talking About Shakespeare?  

@joe_edtech / @LisaBerghoff

My daughter, 14 year old Princess in training, has an IEP because she struggles with reading comprehension. I am just not sure if her case manager hates it or loves it that Katherine's dad is a professional educator. I think she hates it because I ask questions that can sometimes be pointed (maybe snippy). For instance, this year I asked what "reading strategies" she had used in the classroom. The answer was, "I'm sorry, what are 'reading tragedies?'" - Yes, I actually felt my aorta pulse.

So, after the meeting, I went right to the source. I asked my daughter if she learned more from her reading teacher at school, or from the private reading tutor I hired. After I got past the initial discussion about, "Dad, I love all of my teachers equally," I finally got the answer I was looking for. "Well, the stuff that I read in school is all pretty much the same, and very boring. The stuff I read from the reading tutor is a lot more exciting, and I understand it and remember it a lot better." Of course, her comment speaks to the importance of reading selection, but she went further. "With [the private tutor] we make a lot of mind maps and it helps me remember things a lot better."

Mind Mapping! Concept Mapping! How often we forget to take such a simple step even when we know most of our kids are visual learners. In my district, we used to use a very expensive piece of software to do this; but in the era of budget cuts, we may or may not have access to expensive, limited use pieces of software. However, concept maps are important whether we are talking about reading strategies, note taking strategies, or simple brain storming activities. I know of three great Web 2.0 tools for creating concept maps collaboratively, without spending a single dime.

The first is relatively new to my repertoire, but it has come to be one of my favorites. Coggle is a web tool, also available as a Chrome App on the Chrome Web Store, that not only allows students to create colorful and dynamic mind maps, it also allows for easy interaction between groups of students and teachers. One of the newest features to Coggle is a chat window where collaborators and teachers can leave notes or engage in live chat, which means, like most good Web 2.0 tools, students can be working synchronously, asynchronously, independently, or with an instructor.

Rather than linked geometric shapes, Coggle mind maps look organic, mimicking connections in the brain. Furthermore, Coggle makes it extremely easy to use color and format text. When the mind map is complete, there is no need to print. You can share it with any user online, store them in folders on your Coggle account, and even organize them in Google Drive. If there is a negative to this tool it is that all mind maps are public - meaning anyone can view the Coggle's you make. That could be a positive, if you are working on a subject that is new to you, you can search through existing Coggles to see how others have mapped the concepts.

Here's a short video intro to get you started with Coggle:


The map to the left, a more traditional mind map, was created in a Web 2.0 program called bubbl.us. For free, you can go to bubbl.us, create an account and start making concept maps. What's more, you can create teams and collaborate on concept maps with other users. With a simple click, you can download your mind map as a .jpg or .png and embed it in a document or on a website.


Google Draw Screen Capture
An often overlooked tool for mind mapping is Google Drive. In addition to docs, spreadsheets, and presentations, you can create Google Drawings. Once in the drawing, you can add, and add text to shapes and "call outs" (think the comics page in your Sunday Newspaper). As with all Google Drive products, it is simple to collaborate and share your work with other users. Drawings can be embedded on Google Sites, in Docs, and in Presentations, or you can simply download them as .pdfs.

If your class is BYOD, or uses iPads or iPhones, there is an excellent iOS App called iBrainstorm that allows users to create simple concept maps with sticky notes. Collaboration is possible, but trickier on the iPad App. But if you connect several iPhones to the same iPad, you can actually "flick" sticky notes from one device to another.

The Chrome Web Store offers several others that might be worth a try, including: ConnectedMind, MindMap, MindMeister, LucidChart, Mindomo, and Mind42.
----------------------------------------------------------------------------------------------------------------------
I'm aware of free software packages like Vue or FreeMind, but are there other Web 2.0 solutions out there like this? If you are using Mind Mapping Software in your class, please share your favorite in the comment section below.

Monday, November 16, 2015

Make Something That Might Be Boring Exciting With Wizer.Me

Wizer.Me

@Lisa Berghoff       @Joe_EdTech

Make Something That Might Be Boring Exciting With Wizer.Me 

As kids, we all did lots and lots of worksheets in school.  I can remember all of the purple carbon paper residue coating my teacher's fingers as she handed stacks of papers to the first student in each row.  I can also remember a voice screaming in my head saying "these worksheets are SO boring!"  The worksheets of the past seemed a necessary yet extremely dull way for us students to practice our basic skills and turn in piles of pages to be graded.  As educators of the technology age, we really should set the bar higher for both our students and ourselves.

I'm happy to say that those old boring worksheets are a thing of the past.  If you find yourself in a situation where you feel that worksheets are still the best tool for the job, I'm happy to introduce you to Wizer.Me.  Wizer.Me is a free, simple and quick tool for teachers to create their own interactive online worksheets, use easy to find relevant materials, and customize them to their needs.

That's right, Wizer.Me helps you create interactive worksheets.  These allow you to give your students a blended learning experience without a lot of legwork in advance.

You can quickly create an account by signing in with Google.  The website is incredibly simple to use and offers you so many fantastic options.  There are several backgrounds to choose from or you can always upload your own image.   You can create your "worksheet" by choosing from  the basic options such as multiple choice, open question, or matching.  However, you can also add an image for your students to label, include a video for them to watch, a chart to fill in, a link to an article to read, fill in the blanks, embed a vimeo, thinglink, Google maps, and much more!  Of course, there are lots of Wizer.Me assignments already created by your fellow connected educators and they are happy to share.   If you click on the "featured worksheets" button, you will be taken to a webpage filled with assignments ready to be used.  At first glance, I noticed several interesting looking assignments for math, science, and social studies.  Some of the titles that I saw were: "parallel lines and angles", "atomic numbers and mass numbers",  "world religions" "solving special systems of linear equations", and "common life processes of living organisms". In addition, there were several pre-made assignments in Spanish.  These are there for you to use as inspiration or you can copy and edit them to suit your needs.

Once you have created your assignment, you can get the link, automatically assign it in Google Classroom, or give the students a special pin code to access the worksheet.  You can choose which method you want to use to send it to your students.  After students complete the worksheet, you can assess their work and opt to have feedback sent directly to them.

I know I say this about many new tech tools but Wizer.Me is an outstanding tool and I highly encourage you to check it out.  I couldn't resist creating a worksheet for you all to complete:
Click This Link

What are your favorite tools for blended learning?  Go ahead and post in the comments section below.


Tuesday, November 10, 2015

Using Interactive Images Using thing Link

Sign up for a free ThingLink account to create interactive images
Creating Interactive Images Using ThingLink

@joe_edtech/@LisaBerghoff

Earlier this Fall I took my daughter and a friend of hers to the Lincoln Presidential Library and Museum in Springfield. Since I am a bit of a History nerd - specifically an American Civil War nerd - my daughter is not new to the topic. She's been dragged across the battlefield at Gettysburg, carried to Ford's Theater in DC, and even read a young adult version of the story of Lincoln's Assassination and the hunt for John Wilkes Booth. But there is something powerful in an image. As visitors walk through one of the exhibits at the museum, they turn a dark corner and enter a room flooded with uncomfortable red light bathing a slave auction. We hit that room and I felt her little hand grab mine and I looked at her. Her face was covered with shock, fear, sadness - she'd read all about this. But now she saw it. And it affected her.

When I taught history, I gradually came to believe I spent too much time focusing on words, and not enough time focusing on images. I'm not saying words aren't important - they really are what we have from most of history - but images engage the emotions. That's not a new or shocking discovery, researchers have been saying it for years.

With a "free-ish" Web 2.0 tool called ThingLink, it is easy to take any digital image and make it interactive - an image to explore instead of just take in. Below, I've taken a simple image of the State of Illinois and added a couple of Tags. The tags are interactive and can take your students to places where they can find more information. Take your mouse and hover over the image and you'll find there are two interactive tags. Click them, and they take you to an informational website and an overview video.


Creating an interactive image is easy. All you have to do is choose an image from the Web or upload one from your computer. In the "Text" box, type your tag. This can be a short description or a set of directions. In the "Link or image address" box, you can make your tag interactive. I've labeled "Alton, Illinois" on the map. When students click that tag, I want them to be taken to the official website of the City of Alton, so I pasted that URL in the "Link or image address" box. By the way, you can put the URL of information websites, videos, or link to your classroom website or LMS. The images you create can be saved publicly or privately.


ThingLink allows you to tag videos as well. In the following video, I've added two tags - both links to different websites that can provide students with a little more information on the video they have been assigned to watch. You'll notice the tags right away because they are blue text boxes stamped with an "i" icon for information.


I introduced ThingLink by calling it "free-ish." Everything that I've demonstrated in today's blog post can be done with a free account. However, there are several different levels of premium accounts that will give you access to more features. If you are sharing with students, a free account should get you all that you need.
----------------------------------------------------------------------------------------------------
Want to take your image creation to the next level? Free Technology for Teachers published a piece on using Google Slides, ThingLink, and Snagit from Chrome to have students create interactive presentations to share with the class.

Tuesday, November 3, 2015

Dualless: For Those Of Us Who Don't Have Dual Monitor


screenshot from Dualless website

@LisaBerghoff               @Joe_EdTech


Can you believe it's November?! First quarter is over and we are in full school mode.   As you continue  to adjust to your students using their devices, you will no doubt have an occasion where you will want them to have many tabs open.  For example, you may ask them to have a website open while they also have a notes page open.  When having multiple tabs open becomes commonplace your students will probably wish that they had dual monitors because clicking back and forth can be cumbersome and opening multiple windows becomes tricky on a chromebook  because you can never get the window in just the right spot or find ratio that you're looking for.

Screenshot of ratio options
Dualless is a "poor man's dual monitor" solution.  It splits your browser windows into two by just 2 clicks.  The ratio can be adjusted according to your needs.  This extension simulates the environment of a dual monitor. Also, there is a new bookmark feature that lets you relaunch your favorite site in a new tab and windows will be split in the recorded ratio. For example, you can have Dualless set to always open a class notes page in one window and another window is open for research.

Dualless is an extension that is found in the chrome web store.  Since it is an extension, the little icon can be found in the far right corner of the box where web addresses go (that's called the omnibox for those of you who like to learn new terminology).

Dualless is not flashy or complicated. It does exactly what it says it does and it helps add to the functionality of the chromebooks.  By allowing students to work with two windows at once, it should make it easier for them to focus, rather than clicking back and forth between tabs.

Screenshot of Lisa's screen using dualless

What other functionality tools do you use in your classes? Please share with us below in the comments section.