Adding Assignments in Schoology
@LisaBerghoff/@Joe_EdTech

Some of the most frustrating words that I hear as a teacher are "I didn't know what to do". I have planned, organized, color-coded, copied, explained, and demonstrated how to complete the assignment and yet it never fails, there is always at least one student who announces that they lost their assignment, they weren't sure what to do, or they didn't understand the instructions. Instead of shaking my head in frustration, I have decided to add my assignments digitally in Schoology.
Now, I'm a huge fan of "less-paper" and not necessarily "paper-less". I believe in blended learning and using the appropriate materials for the task, which means sometimes my assignments are digital and sometimes my assignments involve turning in a physical thing, such as a piece of paper.
The good news is that in Schoology, you can enter assignments in one place and they will automatically show up in the students' calendars as well as in the grade book. One thing that has been so interesting to me in this position is seeing how everyone goes about a similar task in a different way. That being said, there are many ways to add assignments in Schoology. Here are the simple steps to help get you started.
Here are the basic steps to create an assignment.
Once you are in your course, use the Add Materials button. You can also find this button within a folder
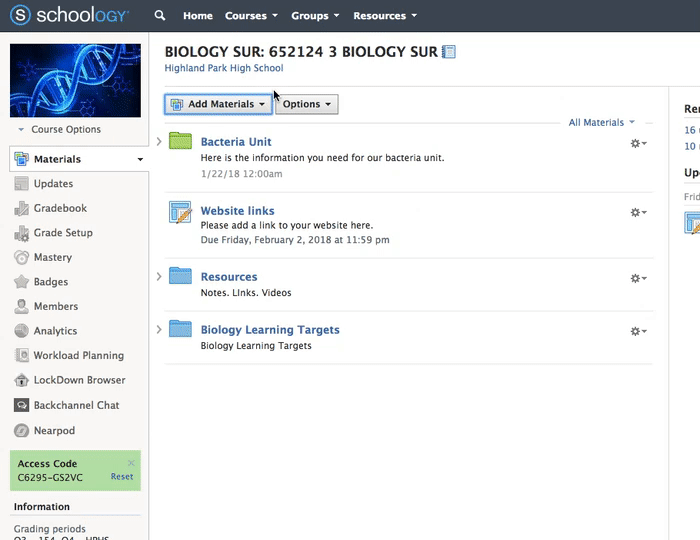
1. Click Add Materials
2. Select Add Assignment
3. Fill out the details:
- Enter a description such as directions that the students need to complete the assignment.
- Set a due date to put the assignment on the calendar. It will also show up on the Upcoming area and will send overdue notifications if the student does not submit by the due date.
- Select a grading category. If you don't choose one, it will default to Ungraded and will not appear in the grade book.
- Select a Scale (THSD113) is the scale for the district, or create a Rubric.
4. Take a look at the Advanced Options that you can turn on or off. Hover over the icons to see what they are.
- Individually assign to a specific student or group
- Align learning objectives (more on this later for our SBG fans!)
- Lock in order to prevent students from submitting. You might want to do this after the due date has passed.
- Enable submissions if the assignment requires the students to turn something in.
- Publish to students or hide from their view if you're not ready for them to see it yet.
- Grade statistics will show the statistics for the assignments to students
- Enable comments so students can comment on the assignment
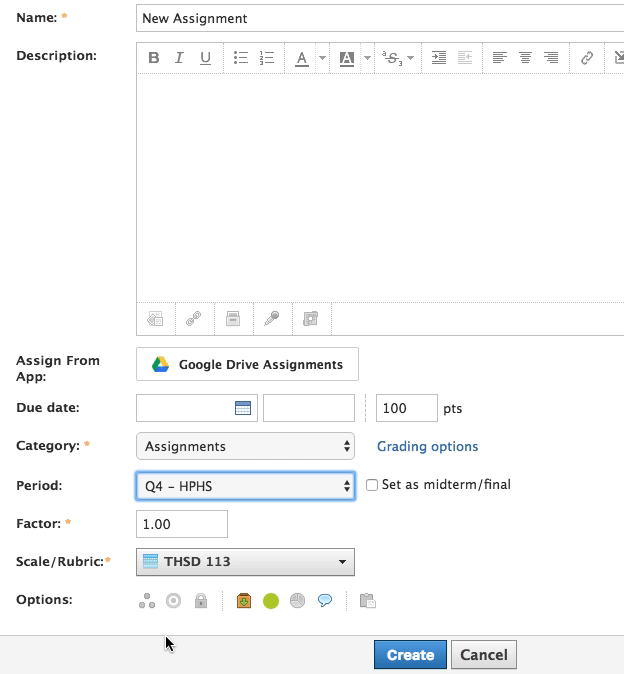
5. Click Create
Did you forget something? That's ok. You can always go back in and edit.
Want to see how it's done? Here is a short video showing the basics of creating a Schoology assignment in your course...
Ready for more? Here's Part 2, which shows additional options.
You can click here to watch the rest of the videos from the Schoology help center.
No comments:
Post a Comment