Another Round of Schoology Tips and Tricks
@Themrkim/@LisaBerghoff


@Themrkim/@LisaBerghoff
It's week 10 and with some real, concrete Schoology experience under our belts, this seems like a good time to learn some new tips and tricks! The following items are solutions to some commonly asked questions and useful features that we've found so far. As always, we really appreciate everyone's patience and enthusiasm as we learn Schoology!
1. How to find grades for students who drop/transfer out of my class?
Course changes happen all the time, and if it happens days, weeks, or even months into the semester, the recipient teacher will need that student's grades. Here's how:
Instructions for the original teacher
- On your Schoology page, click on "Members" on the left-hand side
- Then to the right of, "Add Members" click on "Inactive"
- This will give you a list of all of your students who have been removed from your course
- To the right of the student's name, there are three colored bars. Click that and it will show their grades
- You can print the grades the usual way by pressing “Ctrl + P” or you can save it as a PDF. To save it as a PDF, click “Ctrl + P” and change the destination from your actual printer to the “Save as PDF” option.
2. Adding other staff or senior teachers to your Schoology Page
Luckily I still get to teach 1 section of political science, and Lisa Allen and Amy Skonberg round out the rest of the poli sci team. I wanted Lisa and Amy to be able to see my course, calendar, and assignments that I posted. If I had a senior teacher, I would’ve added them as well. Here’s how:
- On your Schoology page, click on “Members” on the left hand side
- Once you click, "Add members" a box full of names will appear. Switch from "Township High School District 113" to your building
- Then type in the name of the teacher or student you would like to add. You can add multiple people at the same time
- Once added, click on the gear wheel to the right of their name. Then click, "Make Admin"
- Once you give them admin privileges, go back to the same gear wheel to the right of their name and click on, "Set Section-level role"
- This gives you the option to give your added teacher/senior access to your class, but controlled access. You obviously wouldn't want senior teachers seeing student grades
Below are the section-level role options. "No grades/ View Materials" would probably be the best option for most cases. That means the added person cannot see or edit any student grades, but they can view your Schoology assignments/discussions/posts.
3. Control what notifications you receive from Schoology.
This can be a daily double for students and staff. The number of e-mails we receive can get overwhelming. Some fun facts: as of March 2018, over 125 billion daily e-mails are sent around the world, and the average worker is responsible for 120 of them. Schoology mercifully gives us complete, granular control over this.
- At the top right hand corner of your page, click on your name and avatar
- Clicking on "Settings" will bring you to your main account page.
- Now click on, "notification." Go down the list and decide for yourself what you think warrants an e-mail notification.
4. Organize your gradebook by categories
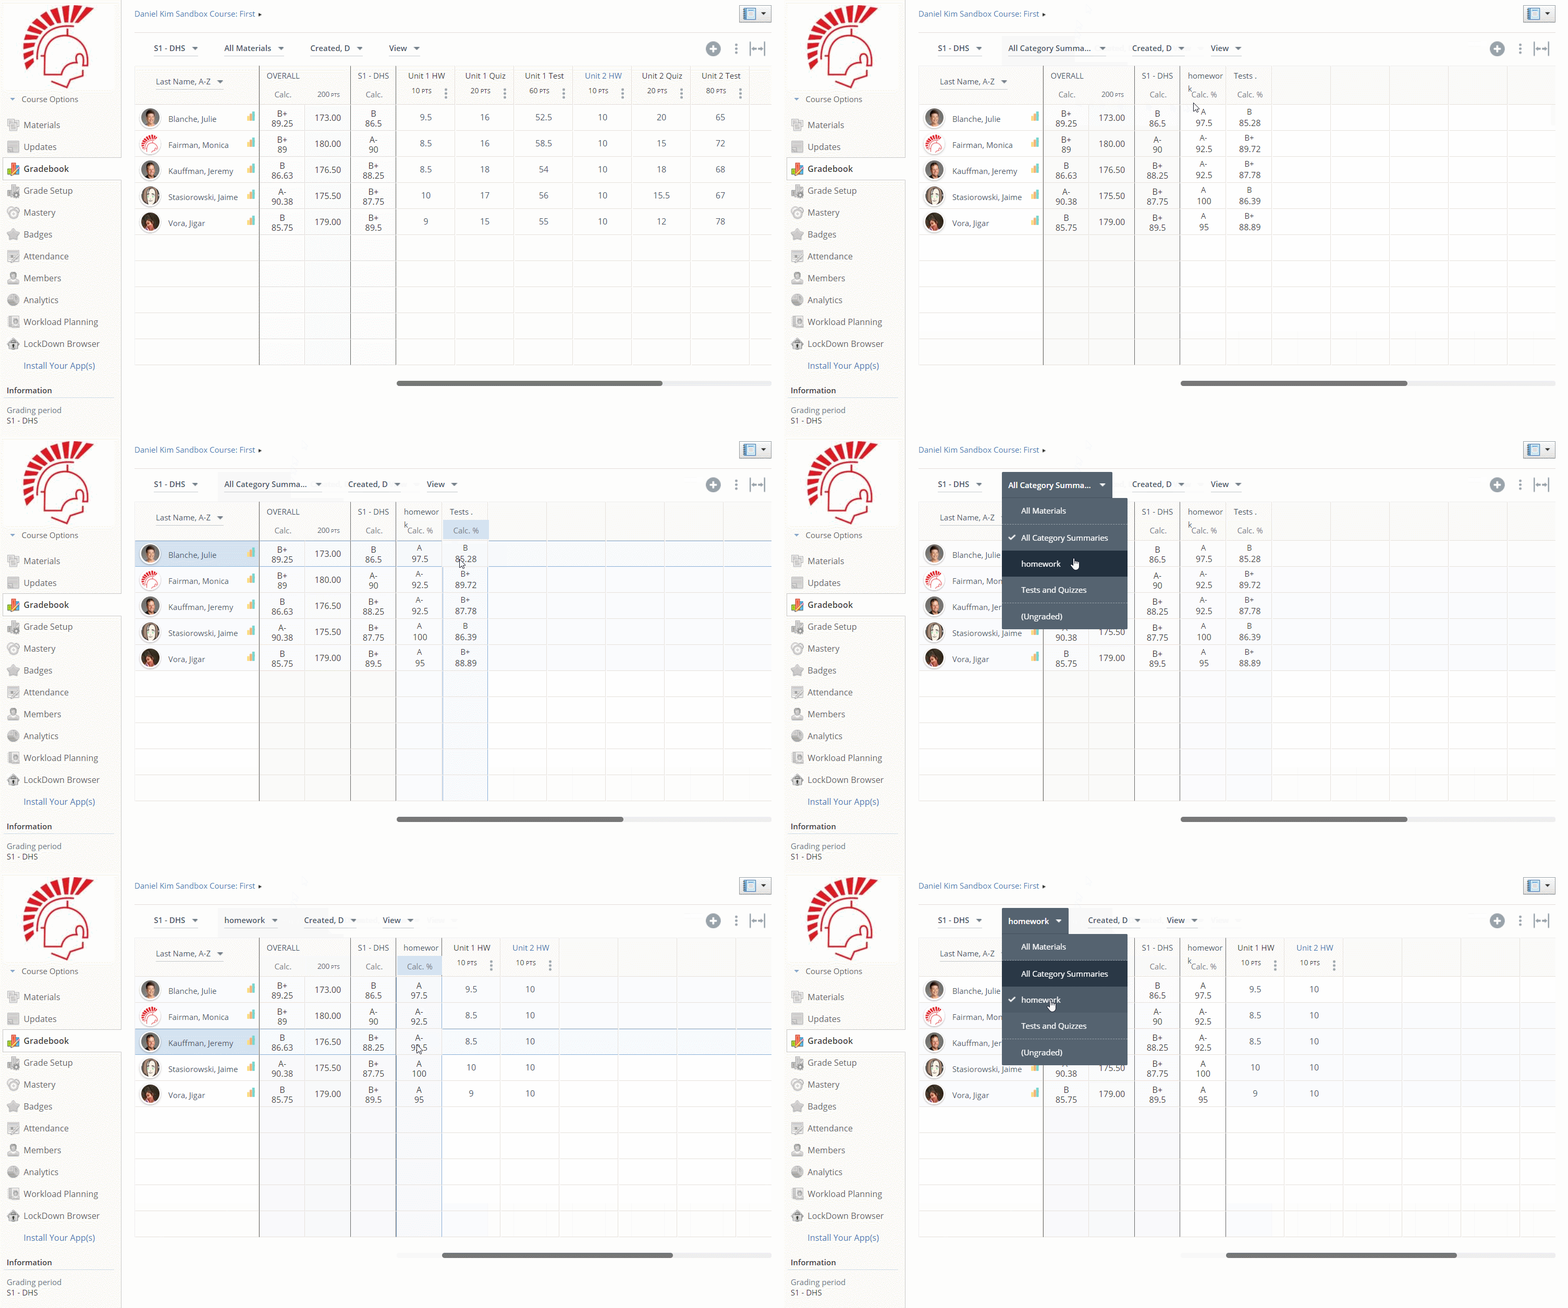
It's important to take a holistic look at a student's performance and one way to do that is to organize grading by categories. The all category summary shows you how a student is doing in each grading category . It might be helpful to see how students are doing in formative assessments only relative to their summative ones.
- In your gradebook, change over from "All materials" to "All category summaries" which will differentiate the grade.
- The same tab will list your categories and will only show gradebook entries from those specific groups.
Have any other Schoology tips and tricks? Or have any other questions? Leave comments below!


No comments:
Post a Comment