9/14/20
Zoom
Zoom Zoom
@LisaBerghoff/@MrKimDHS
Great, we missed the boat again. Just like Apple stock in the 80s and Bitcoin in 2018, hindsight is expensive. Who would've thought pre-Covid that Zoom stock was about to make an 800% jump in valuation in the next 6 months? If only we could go back and whisper to our past selves to stock up on toilet paper and to invest in Zoom...
Anyway - Zoom is here to stay so let's take a look at a few ways we can maximize our educational utility.
ScreenCasting
While Screencastify is still our go-to tech tool for screencasting, you can easily cast through Zoom by sharing your screen to an empty room while recording. Merely share your screen and have your browser ready, hit "record" on Zoom and viola. Note though that you wouldn't have access to ScreenCastify's editing software.
I would suggest cloud recording on Zoom. It's simple and your videos will automatically be converted to MP4 for viewing. You can download it from the website if you need to edit it, or push it to Youtube. So what does the recording process look like?
Recording - Pretty simple through the Cloud
Through our district license, we have the option to record our Zoom sessions via the cloud. This way, your video is converted and prepared for viewing automatically through Zoom, and you will receive an email once it's ready to be viewed. The email will typically have two links, one for you the host and one for your viewers.
Host Link
The first link will bring you to the Recording page where you can change some preferences before you disseminate your video. You're definitely going to want to click the "Copy Shareable Link" button to send the video to your students.
Click on "Share" on the top right corner and you'll see some very important preferences like having a passcode or adding expiration dates. It's probably best practice to limit viewing privileges to "Authenticated Users" only (District users) and to set up a passcode. Once you're ready, you can either send the link to your students via Gmail, or merely post it to your Schoology Page.
DIY Document Camera and ScreenMirroring
Smarter people than I have come up with a pretty simple hack to present hand-written work through Zoom in the form of a
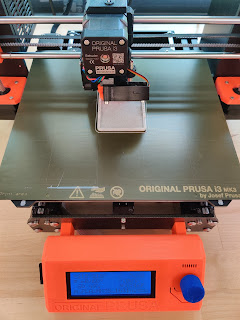
Pocket Doc Cam. It just uses any ol' mirror to reflect the area over your keyboard for a makeshift document camera. If you have access to a 3D printer, I'd suggest using these
STL files to start (MB for MacBook, CTL for Chromebooks, and Dell). You can get really
cheap 2-inch mirror tiles at Amazon to fit these files.
Or if you have an old makeup mirror, you can get creative with some duct tape or string to rig it over your laptop camera. But if you're looking for more of a professional option, click here for
IPEVO's Mirror Cam (Although as of 9/14 it's on backorder).
iPhone/iPad and Doc Cameras
While not technically a "free" tech option, if you have access to an iPad, you can probably find solid utility using an iPad for screen sharing your written annotations, formulas, graphs, etc. With the combination of any stylus and a drawing app, you can easily share your iPad for your students' viewing pleasures.
Lot's of creative ways to utilize Zoom. While I never got rich off of Zoom stock, I'll take being able to see and interact with my students and colleagues. Got more Zoom tips? Let us know below!


No comments:
Post a Comment