Up Your Schoology Game With Clickable Announcement Banners
@LisaBerghoff/@MrKimDHS
If you have been on the internet looking at anything classroom related, you can't really ignore all of the "virtual classrooms" that teachers have created and posted on their learning management systems. I have looked at these and thought they were cute for elementary teachers but did not really see the relevance for high school students. We're serious, right? Anything cute, eye-catching, or flashy would be beneath us. Well, I am happy to say that I have come around and here's three reasons why.
1. Nothing is more important than communication.
If you can't get your instructions, resources, schedules, information, and assignments to your students in a way that is organized and easy, you have lost them. These clickable banners are a great way to give clear guidance to your students. It's like hanging a huge neon sign that says CLICK HERE so they can't miss it.
2. We want our classrooms to look and feel different in person, the same goes in a remote setting.
You would dress up your classroom, wouldn't you? You probably would not do a full on pinterest-worthy 2nd grade style situation but you would put thought provoking posters on the wall, or something so it doesn't look like 4 blank walls. It's ok to put your personality into your remote learning classroom page.
3. It's ok to model creativity. Actually, some would argue it is critical.
Since Sir Ken Robinson's passing, I have watched his Ted Talk multiple times. I have seen it many times before but I am finding his message particularly poignant these days. And while a cute virtual classroom is far from what he is talking about when he discusses creativity in education, I do think we as adults could do a better job of modeling what it's like to think outside the box, dream a little, and make something fun. Have a student who is interested in art? Ask them to create a banner for you!
HOW DO I DO IT?
I definitely went down a YouTube rabbit hole watching videos on how to make these. There are several different methods. Here's what I found to be easiest.
Step 1: Create in Google Drawings
Go to your Google drive and click New, then More, then choose Google Drawings.
Step 2: Create Your Banner
Before you do anything, click the blue share button and make sure to set your drawing so that anyone on the internet can view. Also, it helps if you give your drawing a title.
This is where the fun comes in! There are lots of examples you can look at. Use the Insert Image tool to search the web for copyright-friendly images you can use to create your room. Bitmoji is a favorite here but you can add anything you want. This is where you will also add any links to your images if you want students to be able to click on them. You can even have it take students to another section of your Schoology course.
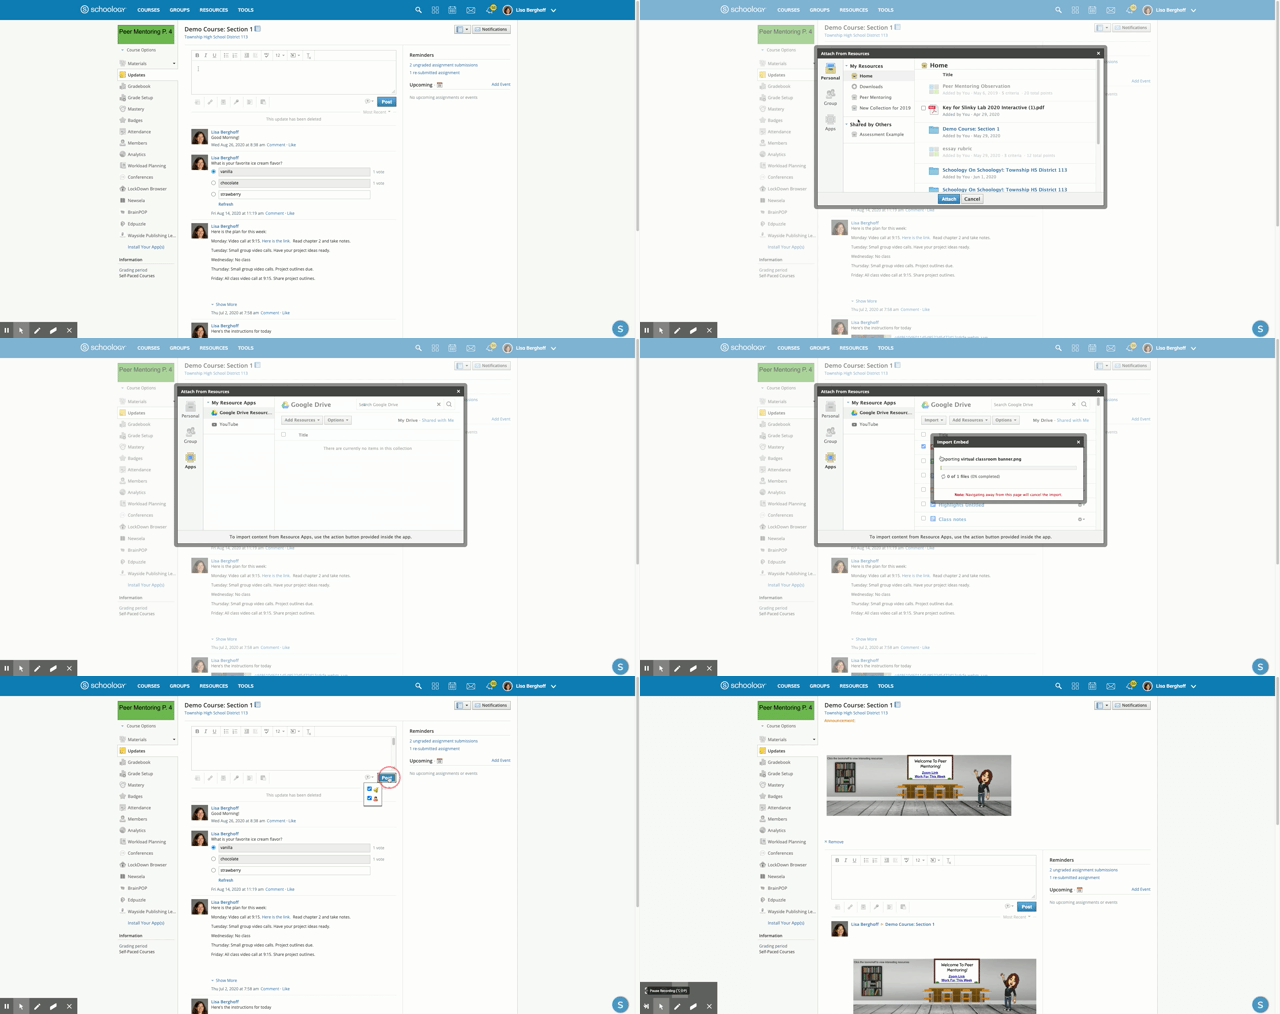
Step 3: Go To Schoology Updates
You can do this in updates and click on the bell to make it an announcement that shows up at the top of your course OR you can create a page on your materials page and have it show up inline. It all depends on how you want to use it. I did mine as an announcement so it lives at the top of my course whenever anyone goes there. That is the way I am going to instruct you now. If you want to see more or have any questions, please feel free to reach out and ask!
Step 4: Click The Resources Icon and Choose Google Drive Resource App
When you click the Google Drive Resource App you will see your drawing. Click the box and then click import embed.
Step 5: Post
You can click the bell to post it as an announcement. That means that it will stay at the top of your Schoology course even if your students are no longer on the updates page. If they navigate to the materials page, the clickable banner will still be there!
Also important to note, anything that you change on your Google drawing will sync and update on your Schoology course.
This is a great "hack" for getting around just posting text in updates.
Want to learn more? Reach out and set up a time to meet.


No comments:
Post a Comment