Make Student Videos Simple With
Screencastify Submit
@LisaBerghoff
We have known for a long time that video can be a powerful learning tool. There were teachers who had pretty sweet recording setups who would put their videos online for the rest of us to use and remix. I can remember the first time I took a look at Kahn Academy and was blown away by how effective it was. The idea of creating videos ourselves and being seen on camera was a pretty scary proposition. We all had to get over that real fast during the pandemic. We also learned that having our students record themselves can be a wonderful way for them to demonstrate their understanding. With the easy access to recording tools, we now know that a recording studio is not necessary, unless you are teaching video production.
Screencastify is one of those tools that is small but its impact is huge. When you see that cute little arrow in your extensions bar, you know that you can record your screen while you talk, but there's a lot of power built into that little extension. Let's unpack everything that is inside Screencastify.
What is Screencastify?
According to the Chrome Webstore, Screencastify is Chrome's simplest free screen recorder and interactive platform, empowering everyone to be a better communicator. A screencast is a type of video content that captures what a person sees on their own screen. Screencasts often include audio narration and may also include an embedded webcam video so that viewers can see the person who’s creating the screencast. Screencastify also has optional drawing tools that can be used while recording. These tools can help guide your students has you are teaching. Watch the two minute video below to learn more about the drawing tools.
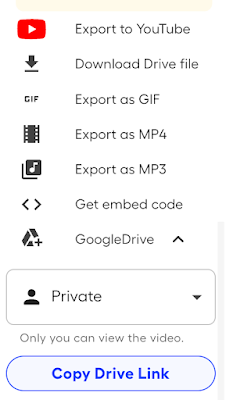
One of the most beautiful things about Screencastify is that your recording will automatically be saved to your Google drive, making it super easy to share with a link. No need to download, upload, worry about file size, or whether or not your students will be able to access the video. Yes, you can download your video to your computer. You can also export to YouTube. There is also the option of embedding your video with the html code. In other words, you don't have to worry about how you're going to get your video to your students.
- To access Screencastify Submit, click on the Screencastify extension and then from the more menu (three horizontal lines) click "My Recordings" and then click "Submit".
- Click on one of the templates or choose "New Assignment".
- Give the assignment a title and enter the instructions.
- You can also adjust the assignment settings here, including what type of video submission you want your students to create. You may just need them to record their screens, or just their webcams, or both. Pay attention to "link privacy" and "video privacy" to adjust who can access the student's videos.
- Click "Create And Share" when you are ready to send it to your students.
If you want some help, Screencastify has put everything you could possibly want to know about the submit feature here.
- Add Questions: Yes! You can embed questions into your video so your students need to respond before they can continue. Click "Add Quiz" and create your questions. Add multiple choice, short answer, or a note.
- Add captions: Screencastify will automatically generate captions for you once you click the "Add Captions" button.
- Use the AI assistant: There is a built in AI assistant that can help enhance your video by generating a transcript, creating captions, generating a title, generating a description, or soon there will be the ability to add an AI voiceover.
- Translate your captions: Once your captions have been created, you can translate them into a number of languages.
Want some help? Reach out. I'd love to work with you!


No comments:
Post a Comment